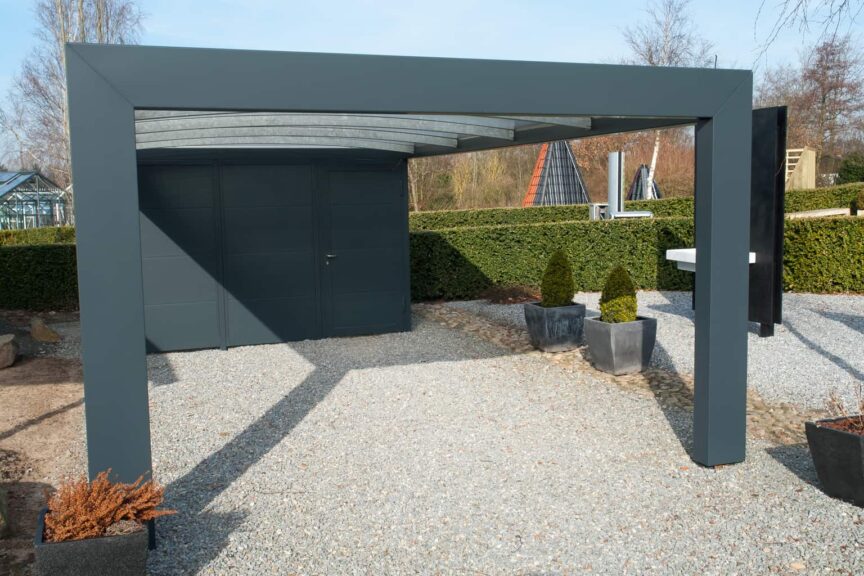
A freestanding carport is an excellent way to keep your car safe from the elements. As a stand-alone structure, a freestanding carport gives you plenty of latitudes regarding size, design, location, materials, and roof lines.
To build a freestanding carport, you need to identify the ideal location, create the design, check with the local ordinance, and get the necessary tools and building materials. You can opt to build it yourself or get a professional to do all the heavy lifting.
As with all construction jobs, building a freestanding carport call for excellent planning and execution. If you’d like a thorough step-by-step guide to walk you through the entire process of building a freestanding carport, keep reading.
1. Identify the Site
Ideally, it would be best to site a freestanding carport close to the house for security and convenience. Siting it too far away would mean getting soaked during the rainy season.
What is more, your local municipality has a say about where you can locate a carport on your property. Check with the local city planning office for guidelines and building code.
Be sure to get the necessary building permits if your municipality requires them. The last thing you want is to incur legal trouble that could see you paying thousands of dollars in fines.
Before the city can issue building permits, it might require you to provide some of these documents:
- Proof of ownership
- A filled formal permit application worksheet
- A drawing of the proposed carport design
2. Design the Carport
Some municipalities might require you to furnish them with a carport design that’s certified by a licensed structural engineer. Others may not be as strict, giving you the leeway to design it or purchase and modify a plan to suit your needs.
Here are a few factors to bear in mind when designing your freestanding carport:
- The size. The number and size of the cars you wish to shield from the elements dictate the carport’s size. With space allowing, you can build a freestanding carport to shelter as many vehicles as you like. Notably, a multi-car carport needs to be a stand-alone structure.
- Building materials. Wood and metal are the top carport building materials, and you should review the pros and cons of each before deciding. A metal carport is ideal in areas with extreme weather such as hurricanes and windstorms. A wooden one is perfect if looking for the DIY-er drawn by wood’s rustic appeal and natural look.
- Budget. The available budget determines the size and choice of building materials. According to Fixr, the average cost of building a carport ranges from $2,000 to $10,000 depending on design, size, materials, roofline, and more. Ideally, you should budget for a carport that increases your home’s curb appeal and its value in addition to protecting your car.
3. Purchase the Building Materials
You can choose between wood and metal when building a carport, depending on the style, design, and local climatic conditions. Climate plays a huge role in influencing both the design and building materials. However, you can customize the basic structure and use any available building materials or those that suit your budget. Feel free to experiment as it can lead you to achieve excellent results.
- Metal carports. Metallic carports are made of steel, aluminum, and other metallic composites and often feature polycarbonate, fabric, or metallic tops. They mostly have open sides and are typically built from prefab sets or kits. Prefabricated carports made from galvanized metals are the best option if looking for a quick project.
- Polycarbonate carports. Such carports are made from aluminum frames with aluminum posts covered with a thick, translucent polycarbonate plastic roof. The roof lets in the light while filtering out the harmful UV rays.
- Wooden carports. They’re most common because they’re easy to build and customize. They come in different styles and rooflines, including traditional shingles or the modern polycarbonate. Pressure-treated lumber is the best choice as it makes for a sturdy and durable carport that will serve you for many years.
4. Measure Out the Carport
A carport to house the standard car measures 16 x 8 feet (4.9 x 2.4 m), forming a rectangle. Plot the rectangle on the chosen site, ensuring a proper layout, and having a professional-grade layout is the key to success.
The basic freestanding carport uses six posts – one at each of the four corners and two more in the middle of the length dimensions. Mark the position of each of the six posts on the ground.
Batter boards and a string will help you get the perfect results when marking the holes. Use the 3-4-5 rule on the corners to ensure they’re perfect right angles and adjust the strings until the diagonals are equal.
If sheltering a bigger car, an RV, or multiple vehicles, you need to adjust the measurements to fit your needs.
5. Dig the Holes for the Foundation Piers
Once you’ve measured out the layout, it’s time to dig holes for the foundation piers. Each hole should be at least 2 feet (60 cm) deep but can be up to 4 feet (120 m) deep in areas with extreme weather.
Deeper holes are ideal for locations with strong winds, heavy snowfall. If frost occurs at grade, ensure the hole is at least 6 inches (15 cm) under the frost line.
Pour in at least six inches of the concrete mix, then place the poles and continue pouring the concrete mix. Adjust the concrete with a level as it dries to ensure the posts sit perfectly vertical. Allow at least a day for the concrete to harden before installing the beams.
If you’re not ready to set the poles, you can use concrete forms instead and then place the posts later.
6. Prepare the Ground
One distinct advantage of a freestanding carport is that you can erect it over any part of your home. It can be on the grassed patch or existing concrete pad.
Building one on an existing concrete patch is perfect since it saves you time and effort. You jump right into drilling the holes and can get the project done quicker. You can drill the holes into the concrete or slightly to the side on the unpaved ground.
When starting from nothing, remove the grass layers with a shovel and tamp the ground to make it as flat as possible.
You have the option of leaving the ground bare or pouring concrete on it. Naturally, a concrete floor towers over the unpaved one, but that all boils down to your budget and preferences.
If you opt for a bare ground cover, consider laying down a layer of crushed granite. That way, you’re rewarded with the sound of crunching gravel as you pull out and pull up to the carport. Most importantly, the gravel keeps you from tracking dirt into the house and keeps the ground from wearing over time.
7. Pour Concrete
Excavate and remove about 7 inches (17.75 cm) of dirt from the carport’s slab area. That allows for a 3-inches (7.75 cm) gravel base and 4-inches (10 cm) of concrete.
Before pouring concrete, you need to build concrete forms using 2 x 6 (5 x 15 cm) or 2 x 4 (5 x 10 cm) lumber. Secure the concrete forms in place using deck screws or wood stakes and ensure there’s a ¼ inch (0.64 cm) slope every 12 feet (3.65 m) to allow for natural surface runoff.
Pour three inches (7.5 cm) of all-purpose gravel, spread it evenly over the slab area, and then level it off. Compact the gravel with a tamper, then dampen it with a garden hose before pouring the concrete mix to avoid shrinkage.
Pour the concrete mix on the slab area and consolidate the mixture over the entire slab area. The mix should rise 2 to 3 inches (5 to 7.5 cm) over the concrete forms.
Use a long piece of wood (ideally one that crosses the slab’s width to rest on the concrete forms) to screed the concrete mix until it levels with the concrete forms. Move the piece of wood back and forth across the surface in a sawing motion to remove the excess compound until the surface is level.
Fill any low areas with the concrete mix and repeat the process until the entire surface is level.
Once the concrete loses its sheen, smooth the surface with a wooden float with an arching motion. It brings cement to the surface and consolidates the concrete to ensure a durable finish.
Once you’re done floating the concrete, run a stiff-bristled broom across the concrete slab. Keep the broom strokes in the same direction to give the concrete a non-slip finish.
Next, cut in the control joint into the concrete slab using a groover and a straight edge. Control joint allows contraction, expansion, and movement of the concrete slab. The control joint should be at least a quarter of the slab in thickness and placed every ten feet of the concrete slab.
Use an edging tool to shape and consolidate the concrete slab’s edges to give it a sharp finished look.
Water cure the drying concrete slab with a fine water mist for at least 3 to 5 days. Alternatively, you can use a concrete cure seal with a roller, brush, or sprayer immediately after applying the concrete to reduce the curing time.
8. Fasten the Beams
Once the concrete foundation fully cures, it’s time to place and fix the posts (if you’d used concrete forms instead of the real posts). Ensure the posts are in alignment and sit at the same height before attaching the beams.
Start with the front and back beams. Secure the two cross beams on their respective posts using nails and fasten them using T-shape hangers. Just be sure the beams are level before nailing them down.
Next, fasten the side beams by nailing them on top of the shorter crossbeams, all the while ensuring they’re level. Be sure to research the load-bearing specifications in your region if you experience severe weather. You want to ensure the structure is strong and durable.
For extra strength, you can attach supporting beams to the top of the poles.
9. Fasten the Rafters
Flat-Roofed Freestanding Carport
A standard freestanding carport with a flat roof should have six rafters measuring 2 x 4 inches and 10 feet long (5 x 10 x 300 cm). You have a choice of two methods when fastening the roof to the core box – the hanger or the notch method.
In both methods, the front and back rafters must be flush with the front and back beam while the remaining four rafters are placed equidistantly along the entire length of the carport.
Hang Method
It calls for some metal joist hangers, which come in various shapes and styles. Joist hangers allow you to fasten 2 x 4 inch (5 x 10 cm) pieces in just about any orientation. The angle at which the rafters meet the beam depends on the carport’s design.
With the hanger method, the rafters lay atop the beams where they are fastened with nails into the beams. Metal hangers bend to accommodate some variations, so don’t stress about finding the exact match.
Notch Method
The primary goal is to rest the rafters on the edge of the beams. Therefore, you need to place the front rafter on the beams and mark where it touches the side beams with a pencil.
Then you need to carve out a notch on the rafter with a circular saw to allow the rafter to sink about 1/3 of an inch into the beam. Refine the notch until the rafter rests solidly on the beam. Repeat the notching process for the remaining five rafters.
It would be best if you angled the nails when fastening the rafters using the notch method to reach the beams below.
Gable-Roofed Free Standing Carport
To pull off a gable roof’s sloped look, you need to use double beams and build the characteristic roof trusses.
Since a gable roof is heavier than a flat one, it’s advisable to use double beams on the side for strength and higher load-bearing capacity. One of the beams should be outside and the other inside the carport, sandwiching the post between them.
Align each beam with its correct position and mark the part where it meets with the vertical posts. That facilitates the drilling of matching holes on the beams a. Inserting ½-inch, 10-inch (2.5 by 25 cm) long bolts through the outer beam through the post and the inner beams create a strong firm joint.
Be sure to use washers as they help to avoid over tightening and splitting the wood.
Mark the beams along the entire length of the carport every 24 inches (60 cm) to indicate the roof trusses’ location.
Raise the rear or the front truss and place it atop the beams and ensure it’s flush with edges before nailing it to the beams. Repeat the process with each of the remaining beams every 24 inches (60 cm).
You can hold the trusses in place by nailing a long piece of wood across them.
Attach the gable ends on the trusses’ front and rear and use grooved siding to lock them to the trusses. You must align the sheets with great care if you wish for professional results.
10. Build the Roof
Fasten the roof boards to the rafters. Plywood, which comes in 4 x 8 (1.2 x 2.4 m) sheets, is the choice material since it’s durable and robust. Arrange the sheets on the roof boards and ensure a six-inch (15 cm) overhang on each side to allow for a uniform look.
Tongue and groove plywood sheets are the best choice for roof boards since they’re easy to fix and deliver a rigid roof. Align the sheets properly and nail them every 6 to 8 inches (15 to 20 cm) for the best results.
Attaching an overhand to the front and rear of a carport with a gable roof gives it a touch of style and helps protect the gable ends from the rain.
Cover any overhang with plywood and fit trims to the rafter’s ends to give the carport a polished look.
Caulk the plywood seams and ensure there are no gaps between the sheets.
Cover the finished plywood roof boards with synthetic or tar paper to ensure a waterproof surface. Waterproofing the roof before installing the shingles keeps the elements out and increases the carport’s lifespan.
11. Fasten the Shingles to the Plywood Roof Boards
For extra protection, it’s advisable to cover the roof boards with weather sheeting. Cover every inch of the roof board with three-tab shingles to finish off the carport’s roof.
Other roofing options include metallic, fiber, or polycarbonate roof. Feel free to explore each of these choices but check if they’re eligible under your local building code.
12. Reinforce the Joints
Reinforcing the significant joints with metal braces allows extra stability and improves the carport’s structural strength. Crucial places to strengthen include joints between posts & beams, beams & rafters, among others.
Staining the wood element with a protective coating helps to increase their lifespan and minimizes damage by the elements.
Conclusion
Carports are excellent DIY projects for the weekend warriors looking to shield their cars from the elements. More than keeping the vehicle safe, carports improve the home’s curb appeal and boost its value.
You have a choice of building a wooden, metallic, or polycarbonate carport. While each has its pros and cons, wooden carports tower above them all. Wooden carports are sturdy and durable and will serve you for a long time by outlasting their metallic and polycarbonate cousins.
Sources
- eHow: How to Build a Gable Roof Carport
- Quikrete: Pouring and Finishing Concrete Slabs
- Titan Lite Shed Parts: Step by Step Guide to Building A Carport
- Quick Garden: Build Your Own Carport in 5 Simple Steps
- Garden and Home: Build Your Own Lean to Carport
- How to Specialist: How to Build a Double Carport
- My Outdoor Plan: How to Build a Carport Gable Roof
- How to Specialist: Flat Roof Double Carport Plans
Share this Post
Giovanni Valle is a licensed architect and LEED-accredited professional and is certified by the National Council of Architectural Registration Boards (NCARB). He is the author and managing editor of various digital publications, including BuilderSpace, Your Own Architect, and Interiors Place.