Affiliate Disclaimer: Some of the links below are affiliate links. As an Amazon Associate, I earn from qualifying purchases.
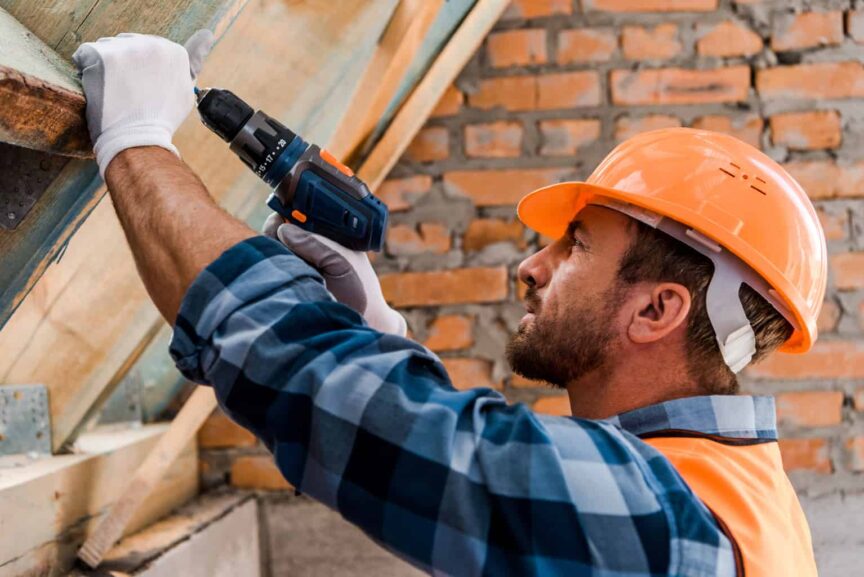
Odds are if you are reading this, you already know how to drill a hole. Install the bit in your drill and pull that trigger. However, whenever you are drilling a hole into a floor joist or any other part of your house for that matter, you need to make sure you are being safe and not causing more damage than you need to.
Make sure you read the following before you drill so you are prepared to carefully and effectively put holes in your floor joists.
When Do You Actually Need to Drill a Hole?
There are a lot of different reasons why you may be considering drilling through your floor joists. While the amount of home improvement options is limitless, drilling through floor joists is necessitated by the installation of:
- Water pipes
- Gas pipes
- Electrical wiring
- Ethernet wires
- Other cabling
Here is the thing though: technically, albeit on a small scale, every time you drill holes in beams and joists you are hurting the structural integrity of your home. Now, that is not to say that drilling three too many holes in one joist will make your house fall down.
But it is entirely possible that you can weaken a joist enough that it falls apart, making that part of your floor very dangerous. That is why drilling through the joist is discouraged unless no other option exists. Besides, drilling sometimes multiple holes takes work, and quite frankly a few easier options exist when they are available. Inspect for the following possibilities first:
- Staple underneath the joists
- Go across not through
- Use existing holes first
Staple Underneath the Joists
This method is not allowed in parts of the house that are finished or could be partially finished. (Check your local jurisdiction’s building code first for proper rules.) But if you are simply running a wire through the attic and want to keep it off the insulation, which is wise, there is no need to have heat stroke trying drill a bunch of holes.
Instead, observe the following steps:
- Grab a hammer and a small box of wire staples
- Measure out one of the wire ends so you have enough slack wherever the installation is occurring
- Staple at least every 4 feet or once per joist, whichever comes first
- Do not staple too tight as that is bad for the wire- leave a small gap between the wire and the top of the staple
And that is it! The wire is secure and you are done in a few minutes. No need to carry around a drill. Just keep in mind this method will only work for wires, not pipes.
Source: Helpful DIY
Go Across, Not Through
Sometimes, rather than drilling a hole, another route may exist. It is always better to staple across a joist and go around it rather than to drill through it unless the way around is ridiculously longer. Still, in the long run, the time difference is typically negligible. But not having to drill a hole is better for your home.
Use an Existing Hole First if Possible
If neither of the first two options exist, take one last look around. Odds are unless this is new constructions, other wires already exist. A previous contractor may have already drilled a hole for his own wire that was bigger than it needed to be. Do not drill another hole, since that will further weaken the joist anyway.
Instead, just feed your wire through the same hole. Even if you need a couple of extra feet of wire, it is worth it. When feed wiring or pipes through existing holes, make sure you avoid combining:
- Wires with temperature-changing pipes (such as hot water)
- Pipes with aluminum ductwork
- Wires through joist brackets
Picking the Right Spot
Alright, so those other options will not do. You still need to drill a hole through your floor joist. That should be perfectly fine, provided there are only one or two other holes already in its vicinity. Specifically, the hole should fall under the following requirements:
- The middle should be on the center line of the joist: the middle of its vertical dimension. You can eyeball this.
- The hole cannot be 2 inches from the top or 2 inches from the bottom of the joist
- The diameter of the hole cannot be larger than a third of the vertical dimension.
- Keep this at least 2 inches away from any existing holes
Keeping the hole in the middle of the joist evenly distributes the weight of the floor above around it. Wider than a third of the board and the joist’s ability to do that becomes severely compromised.
The 2-inch rule is also crucial. Too close to the top of the joist and you risk cutting into the floorboard above. On the other hand, too low and you might accidentally cut off the bottom piece completely. Because of gravity, that hole becomes useless.
Those rules may sound complicated, but they are really quite simple. Say you need to drill through a floor joist that is 9 inches tall. The hole would need to be within the middle 5 inches of the joist, because of the 2-inch rule on the top and bottom. That also means, because of the one-third rule, that that the hole cannot be wider than 3 inches.
That example is pretty typical for floor joists or if not, close to it. Luckily for wires, half an inch is more than enough. Pipes obviously need a larger hole, but 3 inches should be perfectly fine unless you are undergoing major construction. Gas pipes, for example, are closer to two inches.
Sources: Fine Homebuilding
Notch Dimensions Are Different
Sometimes, however, drilling through a floor joist is about notches, not holes, depending on the type of construction you are doing. In this case, you may be surprised to know that notches need to be smaller than holes. One-sixth of the joist’s height, to be exact.
Why, you ask? By design, a notch interferes with a joist’s ability to distribute weight. As discussed earlier, weight from the floorboard above is distributed around the hole and eventually to the beams on the side.
In a notch, the weight from above hits it and has nowhere to go. The rest of the beam can withstand this easily as long as the notch is not too long. Way too long and the notch could expand on its own, causing the joist to split in two.
Also, in a related point, never cut a notch into the middle of the joist, as this also greatly affects weight distribution. And it should go without saying to keep them far away from existing notches.
Source: Building Advisor
What Is On the Other Side of the Joist?
Okay, so now you know roughly where you will be drilling. Obviously, you have picked out a clear path through the joist. However, what is in that exact spot on the other side of the joist? Usually, you can look and the answer is clearly nothing. In that case, go ahead and start drilling.
However, the answer is not always clear cut (pun intended). Particularly if you are drilling in old work, which is more often than not the case, the chances of something on the other side of the joist are quite high. Items attached on the other side could include:
- Wires
- Cables
- Metal pipes
- Cross beams
If your house is fully operational, it means you are not the first person to install one of those things. Sending a drill bit through them at best is going to make your job take a lot longer since you will need to fix that thing you broke.
At worst you could burst open a water pipe and flood your basement, or even take out an entire electrical circuit, causing thousands of dollars in damages. Always make sure there is nothing behind the joist before you cut.
When You Can See
If this is a joist in the middle of an unfinished basement, chances are high you will easily be able to see on the other side. Before you drill, you notice a wire or pipe. The joist is not maxed out though; there is still plenty of space for the hole you need.
How do you work around that obstacle? One option is to simply drill from the more complicated side instead. But if that bay is too small to insert your drill into, follow these steps:
- Measure the obstacle: its size and where it is on the joist, particularly from the bottom edge
- Measure up the same distance on the other side of the joist
- From there, knowing the size of the obstacle, you can feel confident where it is.
- Drill through, but slowly so you can listen carefully in case you made a mistake and start to hit the obstacle.
Just remember when using this method that horizontal measurements need to be mirrored on the other side. So if an obstacle, for example, is 3 inches up, 2 inches to the right when you measure it will be to the left when you bring your drill back to the other side.
Another thing to keep in mind is that drilling your hole exactly on the middle line is more of a preference than a requirement. Often you will find that a previous electrician stapled a wire horizontally across the joist along the middle line for convenience.
Drilling along the middle line here, of course, would be less than ideal. Instead, simply move your intended hole slightly up or down so that it is 2 inches away from any existing obstacle. And most importantly, do enter the bottom or top two inches of the joist.
When You Cannot See
Unfortunately, sometimes you cannot see what is on the other side of a joist. There could be another joist with a small gap in between, or perhaps a hidden crawlspace that you will be snaking wire through. In this case, it is highly recommended that you look for a better route.
If that is not possible, you have two options, neither of them ideal. One is to use a flashlight to see if that gives you any additional help seeing. The other is to use a stud finder. Although more suited to thinner drywall than thick joists, this tool will give you an idea where any obstacles might be.
If you really suspect something is on the other side of that joist and you simply must drill through it, your only option remaining may be to remove the joist. This is definitely the worst-case scenario.
To do this, follow where the joist ends up and unscrew it from each end. This may necessitate remove anything attached to the joist, like light fixtures and visible wiring, or sometimes other studs.
If all else fails, you might just have to wing it. Remember, if you need to do this, drill very slowly and be careful! If you feel any sort of resistance that does not react like the rest of the joist, you are starting to hit something. Stop drilling immediately and find another spot.
Source: How Stuff Works
Measure Twice, Cut Once
Now, provided you have made sure you have a clear path, it is almost time to drill that hole. But first, it is almost smart to double-check your measurements. Measure twice, cut once as the saying goes. What is worse? Taking an extra minute to confirm with your tape measure? Or anxiously drilling just to encounter a disaster? The answer should be clear.
It is important to note here that marking the spot with just your finger is not totally accurate. Naturally, your finger might move a little bit when the drill bit is close, especially if your drill was not 100 percent ready.
Instead, when you have the spot determined with your tape measure, mark it with a marker in an easy to see color, like black or red. You can draw anything from a line to a circle or even a smiley face. Whatever works for you to make that spot clear as day and keep you on target.
Ready? Keep your hands sturdy on the drill and start it up. (Rickety ladders not recommended.)
Always Err on the Side of a Smaller Hole or Cut
Another tip to remember when drilling a hole through a floor joist is to err on the side of a smaller cut if you can. This is a rather simple idea. Ideally, you would not be cutting any holes, so you really do not want them any bigger than they need to be.
If you have a ¼ inch piece of wire, for instance, by all means, use a ½ inch drill bit so feeding the wire through is easy. However, you certainly do not want to make a 1-inch hole in this situation, regardless of how tall the joist is. The bigger the hole, the less opportunity you have in the future to add more holes should they be required on another project.
This is especially true if your joists are not very thick, as sometimes is the case. If your joists are the depth of standard plywood, you definitely want to keep that hole on the small side to avoid damaging the joist or requiring replacement.
Need to Drill Through Multiple Joists? Make Sure You Have a Straight Line Path First
Now, unless this is a really quick project, odds are you are not only going to be drilling one hole through one joist and calling it a day. Hopefully, you can avoid doing too much work, but typically if you need to drill through one joist you need to drill through a whole bunch.
If that be the case, keep in mind you need a straight-line path through each joist. This makes the job looker neater for electrical work. For plumbing, it is absolutely critical. Steel pipes, after all, are not easily flexible. Here are some tips to make sure you establish a nice and clean route for your joist holes:
- Keep the measurements the same, if possible. You want to keep the heights exactly the same, especially for water pipes.
- For horizontal measurements, base it on something you want to run parallel to. That could be:
- The wall
- Another pipe
- A perpendicular joist or beam
- Once you have all measurements established are sure they line up, mark them all one by one.
After all the holes are marked, you can easily and quickly drill them all.
Sources: Family Handyman
The Best Drills for the Job
Now that you know how to drill through your floor joists safely and effectively, the next step in the process is to pick out the right gear! Naturally, that means having the right drill, not one that will have its extension cord become tangled or worse, its battery dies in the middle of your project.
You want the job done right, not a bad drill that risks ruining your joist. Your floor is kind of important. Here are some of the best drills on the market:
Black & Decker
Black & Decker is the tried and true tool brand for decades, offering quality products at fair prices. The everyman’s tools. This 20 Volt Max Cordless Drill is no exception. 20 volts will give you the power you need to have all those holes drilled out quickly.
And you do not have to worry about buying drill bits separately either: it comes with a 30 piece set. Also includes a battery and charger. You may want to consider investing in an extra battery though so you are not out of luck when one of them dies.
Bosch
Bosch is usually a step above Black & Decker in terms of quality. That means you are able to spend a little less on a smaller drill but still complete the job. That is where this drill comes in handy. It does not come with a drill bit set, but that is fine if you already have your own. Easy and intuitive to use and comes with a convenient carrying case.
Getuhand
This brand is not as famous in the contractor industry as Black & Decker and Bosch. Also, the price is suspiciously cheap. Still, for a 4 in 1, this drill is worth a serious look. It comes with a few basic drill bits so you can start.
However, the different attachments are the best value here. You can easily switch out to a jigsaw attachment with a couple of different blade options. If your next project will involve both drilling holes and cutting notches, this is the way to go.
DeWalt
A DeWalt drill-like this 20 Volt Max Cordless is a bit more expensive than the other three, but you will also never have to buy a drill again, so there is that. DeWalt is known for its quality and packing a small batter like this with 20 Volts certainly packs a punch. This even comes with an extra battery and a heavy-duty case for all components.
Drill Bits
Most of these drills do not automatically come with drill bits, and that is okay. There are plenty of inexpensive options that exist. Just remember: the better the quality, the cleaner the cut and less damage to you floor joists:
- DeWalt– This basic set of 1 inch or less bits cut really easily and take a long time to dull.
- Amoolo– Good for the small stuff like ethernet and small electrical wires. Also efficient at drilling a pilot hole if you just want to see how dense the wood is first before drilling your main, larger hole.
- Diamond Drill Bits– This quality carbon steel and diamond tip set is for the big things like copper pipes and steel pipes for gas and water. Large enough to complete the job. Just make sure these bits are not becoming too big for the joist. And be sure to clean out the wood in the bit in between drilling multiple holes.
Safety Gear?
If you done similar things before and want to just jump right in, that is certainly your prerogative. However, putting on some safety gear before you begin can only help you and even improve visibility. Consider picking up these safety goggles or cut resistant gloves. If the drill bit slips on that smooth wooden joist, you will be thankful you did.
Drilling Vertical Down from the Floor
Not all holes drilled through joists are horizontal. Sometimes, much to your dismay, you need to cut a hole in the floor. If your project involves doing that, try to avoid drilling through the joist if you can. Remember our two-inch border rule? You ideally do not want to break that.
Ways to Avoid Needing to Do That
Let’s say you are installing a brand-new bathtub. You need to cut a hole in the floor to install the drain. But just your luck! The drain lines up with a floor joist. Here are some ways to avoid that situation:
- Move your planned design over a little bit. Floor joists are, at most, 2 inches wide. Surely you can alter your blueprints that much and compensate for that space elsewhere.
- If you cannot move the tub over, try flipping it the other way around. Hopefully, there are no joists over there that pose a problem.
- Use a different location. If your construction is something a bit smaller than a bathtub, you should easily be able to drill through at a different location entirely, even if you need to use more pipe or wire.
Drill on As Much of An Angle as Possible
If those are your plans and you need to stick to them, a joist being directly underneath is not a deal-breaker. You just need to be cautious, that is all. You never want to drill completely through a joist, leaving a total vertical gap. Not only is that a ton of unnecessary work, but you are also destroying any effectiveness of the joist within your home’s ability to stay standing.
To mitigate this, one solution is to drill on an angle. While part of your hole will be through the top side of the joist, it will come out the side rather quickly, reducing damage. This works great for wiring. If you have to, use the jigsaw feature to cut a notch near the top to avoid needing to actually remove wood.
With metal piping, drilling on an angle might not be an option. If you must go straight down, move the drill bit as much to one side of the joist as you can. Even cutting off one half of the joist and leaving the other half present is still better than nothing at all.
Source: Doityourself
Recap
If you made it this far, you are ultra-prepared to safely drill through your floor joists if still necessary. Just remember, the measurements may sound a little complex, but it makes a lot of sense if you think about it.
- Keep the hole towards the middle of the beam to preserve its structural integrity.
- Do not make it too big.
- Clean looking and organized is usually just right.
- If it looks unsafe, it probably is.
One final thought: this is meant to be a general guide, but exact measurements and regulations can vary by state and even county. Always consult your local code book for:
- Construction
- Plumbing
- Electrical
Depending on your specific project, before you begin. And as always, have all work inspected for complete safety verification by your local municipality.
Share this Post
Giovanni Valle is a licensed architect and LEED-accredited professional and is certified by the National Council of Architectural Registration Boards (NCARB). He is the author and managing editor of various digital publications, including BuilderSpace, Your Own Architect, and Interiors Place.