Affiliate Disclaimer: Some of the links below are affiliate links. As an Amazon Associate, I earn from qualifying purchases.
Summary: Fixing a small nail hole roof leak involves four steps: locate the leak, remove or secure the nail, repair with roof flashing, and assess surrounding damage for prevention.
Finding a leak in your roof can be frustrating, especially if you are not familiar with how to fix a leak in your roof. However, these types of leaks are usually small and easy to repair, so luckily, there’s not much to worry about.
Here are the steps you need to follow to fix a nail hole roof leak:
- Find the roof leak.
- Remove remaining nails in the roof hole.
- Repair the hole.
- Assess excess damage.
Finding the exact spot of the leak in the roof is the hardest part. Once you find the nail hole where the roof is leaking, you’ll only need to follow the following steps.
1. Find the Roof Leak
You probably already have a general idea of where the leak in your roof is, but you need to find the exact spot, which can be hard with a leak as small as a nail hole.
First, try using a flashlight to look at the roof in your attic and see if you can find the hole. This method can be difficult with a small leak hole unless you get very close to the roof and your attic has good lighting.
Another option is to grab another person to help you. One of you should stand inside by where the leak is coming from, and the other should go on the roof with a hose. Spray the roof all around until the person on the inside finds where the leak is coming from.
Leaks are more common near components of the roof like chimneys, wents, and anything else that sits on or sticks up from your roof. Also, look where you know nails have been in the past, as that is likely where a leak would come from. So, if you need a starting point for your leak search, try in these places.
Roof leaks in a nail hole usually result from places where nails were previously but then were removed, such as where a cable dish used to be. But, it may also leak where a nail is still in the roof hole. If so, see step two, but you can move to step three if there is no nail.
2. Remove Remaining Nails in the Roof Hole
So, now you know how to fix a leak from a nail hole, but what if there is still a nail in the hole and it is leaking?
Frequently, a leak starts when the nail is not properly hammered into the roof. You have to first remove the bad nail and replace it. Get a new nail, and place it somewhere at least a few inches away from the current leak hole. Or, if it is not holding anything down, you can just remove it without worrying about replacing it.
To prevent this going forward, make sure any future nails are properly hammered into the roof. Otherwise, you can expect more leaks in the future.
Now that the nail is out of the hole, you can move on to step three to repair the hole.
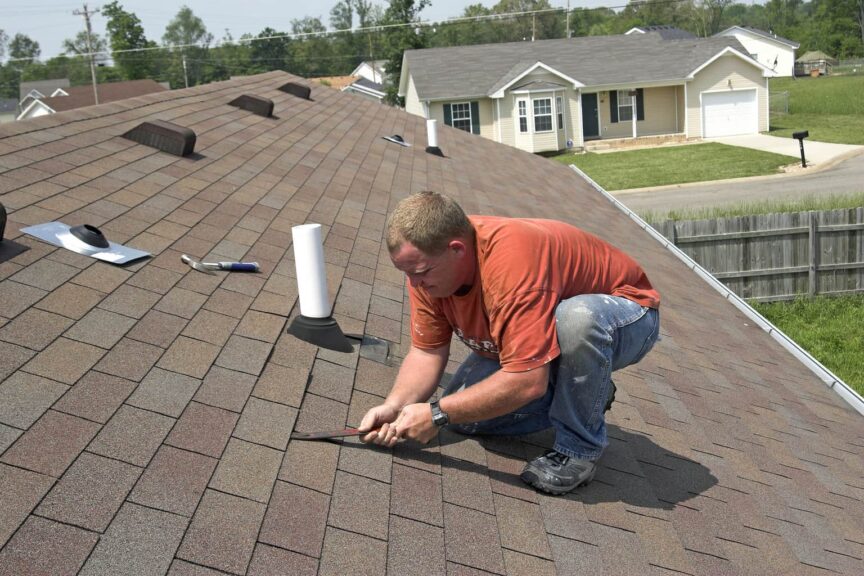
3. Repair the Hole
Now that you know where the nail hole is, you need to fill it. First, you need to put roof flashing on top of the hole. Ensure the roof flashing completely covers the hole and under the shingles.
Then, once the roof flashing is in place, put a small amount of caulk or roof cement on both sides of the flashing to keep it in place.
One benefit of having a small leak like a nail hole is fixing it yourself without hiring a professional. But, you need to have the right materials for the job, which includes roof flashing and sealant. Here are two products from Amazon.com I recommend for fixing nail hole roof leaks:
- Loctite Black Roof and Flashing Sealant Cartridge: This sealant is weatherproof, paintable, and flexible, making it perfect for fixing roof leaks. You can use it anywhere, and it will blend into the environment. And it is not affected by harsh temperatures, sun, or other extreme weather.
- BXI Flashing Roll Tape Membrane Waterproof Patch: This tape is perfect for roof repairs and will easily cover nail holes. The tape is sticky and will stay stuck in cold weather. You likely will not use too much for the roof repair, but you can save the flashing tape for other projects in your basement, pool, vents, chimney, and more.
4. Assess Excess Damage
If the hole has been in your roof for a long time, it may have caused more damage than you would expect from a small nail hole. If there is damage on your roof surrounding the nail hole, you need to fix this damage to prevent any further issues. Usually, this is already solved with the roof flashing from the previous step, but if not, you may have to replace the shingles in that area of the roof too.
While this may take a little longer and a few more materials since you need excess roof flashings and shingles to fix the hole, it is worth it to completely cover and repair the hole. Holes and leaks in your roof can only get worse as time goes on, so fix them before they get too bad.
You can also prevent leaks in the future by checking in on your roof every so often, especially after a big storm or other drastic weather. If you can catch damage early or leaks before they get too big, you will save yourself a lot of time and energy in the future.
Conclusion
Although all leaks are bad, nail hole leaks are the easiest and cheapest types of roof leaks to repair. The hardest part about them is finding them since they are so small, but you just need to cover them with some roof flashing once you know where the hole is.
To prevent roof leaks in the future, properly hammer in and remove nails on your roof, so they are secure and do not let water leak past them.
Sources
- Home Depot: How To Fix a Leaky Roof
- Ace Construction Online: Roof Repair 12 Clues To Finding Leaks
- PJ Fitz: How To Patch a Hole in the Roof
Share this Post
Giovanni Valle is a licensed architect and LEED-accredited professional and is certified by the National Council of Architectural Registration Boards (NCARB). He is the author and managing editor of various digital publications, including BuilderSpace, Your Own Architect, and Interiors Place.