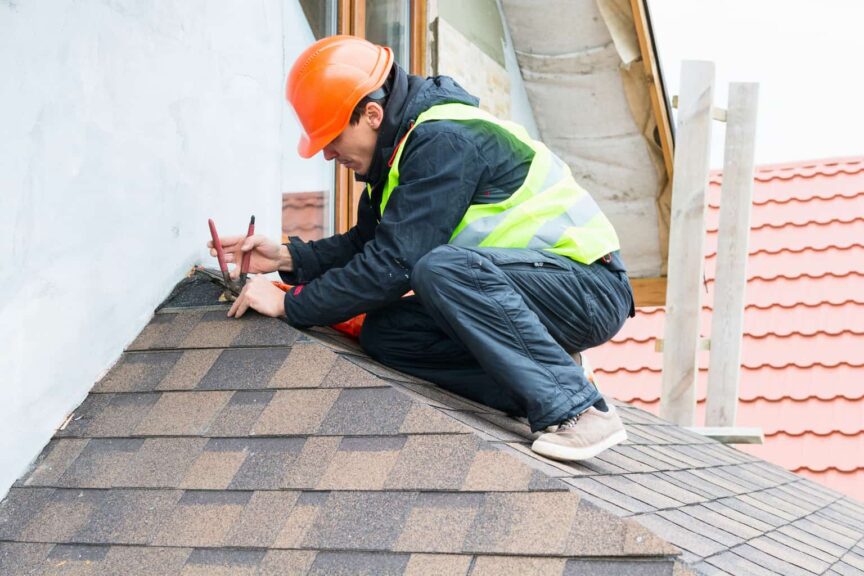
One of the most detrimental elements that can affect a roof or wall of a house is water leakage. A roof or wall that is not properly sealed off from water can be extremely costly to fix, not to mention the hassles that accompany the unwanted water.
Metal flashing, also called roof flashing, goes against a stucco wall to protect it from water damage. For areas where the walls meet the roof, you will need to use the step flashing technique, but you will need kickout flashing in other areas. It is important that you use the right method when you install flashing.
Luckily, it is not that complicated to install roof flashing against a stucco wall, and it can save you a lot of money in the long run because your roof and walls will not be as susceptible to water damage.
Materials for Installing Flashing to Stucco
The first part of installing roof flashing to a stucco wall is to gather the necessary materials. Some of the materials may not be necessary in every case, but it is helpful to have the adequate tools on hand so that the installation process goes well.
- Roof Flashing: Naturally, you will need to purchase roof flashing before you begin the installation. Metal flashing often is made of galvanized steel or aluminum, but it can also come in copper. The size and shape of the roof flashing you buy will depend on the area that you plan to install the flashing. Be sure to purchase enough flashing to cover the entire area that needs the flashing.
- Roofing Felt: If you are working on the roof in any way, you need to use roofing felt on the areas that you will be installing the flashing. If you are only dealing with a wall, then you may not need roofing felt at all.
- Asphalt Cement: One of the ways that metal flashing is secured is with asphalt or roofing cement. As with the other materials listed so far, the exact amount you will need will depend on the way you are installing the flashing.
- Caulk: You will likely need caulk to help seal the edges of the flashing that you install. You can purchase caulk in a number of colors to match the area that you are working on.
- Hammer and Nails: Additionally, you will need a hammer and nails to secure the flashing as you install it. Depending on the stucco that is already in place, you may have to use a drill and screws instead of a hammer and nails.
- Ladder: You will need a ladder to reach the areas where you install the flashing. Always make sure that you have another person to keep the ladder steady while you are on it.
Installing Step Flashing to Stucco Walls
When you are installing flashing, you have to use different flashing techniques to fit with each area. For an area where a vertical stucco wall meets a sloped roof, you will use step flashing. This flashing technique makes sure that the water flows away from the wall and into the gutter.
An important note regarding step flashing is that the National Roofing Contractors Association has guidelines that require step flashing to extend 8 to 14 inches above the shingles. Step flashing will be interwoven with the shingles throughout this process.
Step 1: Installing the Roofing Felt
For step flashing with a stucco wall, you will be working in part on the roof. After you have gathered all your materials, you will lay roofing felt over the area that will have flashing. It is important to overlap any old roofing felt by at least one foot. Use your hammer and nails to secure the felt into place.
Be sure to have another person keep the ladder steady. You should always have another person with you to act as a spotter when you are on the ladder or roof.
Step 2: Add Cement and Flashing
Next, you will use asphalt or roofing cement. Layer the cement on the area that you intend to place the flashing. While the cement is still wet, place the flashing and secure it with nails or screws.
Step 3: Continue Step Flashing
To add step flashing, you will stagger each piece of flashing on top of the next. Continue to layer cement and secure pieces of flashing with nails or screws as you go along. You will add layers of shingles as you go.
Step 4: Finishing Touches
After you have securely installed all the flashing you need, it is time to use caulk to seal the area. If you have additional stucco available, you can use that instead of caulk. The purpose of using the caulk is to seal the edges of the flashing. This prevents water from seeping into the roof.
Installing Kickout Flashing to Stucco Walls
When you install step flashing to stucco walls and a roof, you also need to add kickout flashing. This technique steers water away from adjoining walls, which helps guide it into the gutter instead of sitting on the surface of a wall.
For this technique, you will need to have flashing that is specifically for a kickout. Because galvanized steel is difficult to bend the way you will need it, it is best to buy a piece that is already in the kickout shape.
You will also want to install kickout flashing as you are installing roofing shingles.
Step 1: Laying the Kickout Flashing
Use your roofing cement to add a layer to the wall against the roof’s base. Secure the kickout piece to the cement with nails or screws. After you have placed the kickout flashing, you will continue with step flashing.
Step 2: Adding the Step Flashing
One of the most important parts of installing kickout and step flashing is making sure that the step flashing leads straight to the kickout flashing. Otherwise, the water will not flow correctly, and you could have water damage to your roof.
Add your first piece of step flashing to the end of the kickout flashing and secure it to the roof deck with nails and cement.
Step 3: Installing the Shingles
This process of installing flashing requires you to work on the flashing and the shingles at the same time. You will need to start adding the shingles after you have the initial kickout and step flashing installed.
Add sealant to the flashing’s base before laying a shingle on top. Nail the shingle into place. Then, continue with that entire course of shingles before moving onto the next layer. At that point, you will continue with the earlier instructions for step flashing.
Why is Flashing Needed?
Water can cause serious damage to a building’s overall structure. Although gutters and drain systems help prevent water from seeping into a roof or walls, areas like corners and intersections are especially susceptible to water damage.
Metal flashing can provide several different functions to prevent water damage. It can direct water back to the exterior if it has seeped behind the cladding. It can also protect the point where walls meet each other or where walls meet the roof. Finally, metal flashing can direct water over and past parts of buildings that protrude from the overall structure.
The ultimate goal of metal flashing is to reduce the amount of water that is on any part of the building. Different techniques will likely be needed to prevent you from directing water away from one building element onto another one.
Share this Post
Giovanni Valle is a licensed architect and LEED-accredited professional and is certified by the National Council of Architectural Registration Boards (NCARB). He is the author and managing editor of various digital publications, including BuilderSpace, Your Own Architect, and Interiors Place.