Affiliate Disclaimer: Some of the links below are affiliate links. As an Amazon Associate, I earn from qualifying purchases.
Tiling can be a lengthy job, especially if you don’t know the easiest way to do it. One of the most important aspects of laying tile is keeping the grout lines clean from the thinset underneath, but this can sometimes be a hassle. Is there a way the grout lines clean while tiling?
Here are 7 ways to keep grout lines clean while tiling:
- Use less thinset.
- Spread thinset evenly.
- Use spacers between the tiles.
- Have a sponge handy.
- Use the right thinset color.
- Use an old toothbrush.
- Use a utility knife.
Keeping the grout lines clean while tiling is essential. After the thinset hardens, it becomes a lot more challenging to clean. However, it’s easy to miss a section, which is why it’s recommended to know how to clean grout lines during tiling and after.
1. Use Less Thinset
Thinset, also called mortar, is the adhesive substance that helps tiles stick to the ground. The amount of thinset you should use while tiling depends on the tile size of the tile, which many DIY-ers don’t realize. Using too much thinset can cause a big mess, while using too little can cause your tile not to stick properly.
Many people make the mistake of putting too much thinset, which leads to the grout lines not staying clean. The best rule to go by is to not lay thinset more than 3/16 inch (0.48 cm) thick.
Many people lay thinset with a thickness of ⅛ inch (4.57 cm). However, anything thicker than 3/16 inch (0.48 cm) thick can cause an unnecessary mess and prevent the tile from laying correctly.
2. Spread Thinset Evenly
As thinset is such a crucial part of laying tile, you want to make sure it’s done correctly. Applying it too quickly can cause unevenness, leading to messy grout lines when you’re laying the tile. Choosing the right tools is the first step to avoiding these kinds of issues.
A trowel is a necessity when spreading thinset. I recommend the Clab Depot Notch Trowel (available on Amazon.com). It’s durable yet lightweight and has an excellent non-slip handle.
To get the best results when spreading thinset, you should also get a trowel support tool, such as the Joyful Flappers Trowel Support (available on Amazon.com). This tool allows you to distribute your weight better while spreading the thinset, leading to a more even spread.
3. Use Spacers Between the Tiles
Spacers are essential another essential tool. They keep the spacing between the tiles consistent.
Using spacers while laying tile also keeps you from readjusting the tile. You’ll be less likely to move the thinset around underneath the tile, which would cause more of a mess in the grout lines.
If you’re looking for tile spacers, I recommend the COSMOS Tile Spacers (available on Amazon.com). These spacers come with 500 pieces and are an excellent—and cheap— choice if you plan on having ⅛ inch (4.57 cm) thick spaces between the tiles.
4. Have a Sponge at Hand
Having a sponge at hand while laying the tile will help you clean up as you go. Sometimes when laying tile, the thinset won’t only go between the grout lines but also get onto the surface of the tile, which no one wants.
Having a sponge nearby lets you wipe away these messes. However, a sponge won’t always be able to clean the entirety of the grout lines.
The best sponge to use while cleaning thinset or grout is the QEP Grouting Sponge (available on Amazon.com). Unlike regular sponges, this sponge has rounded edges, which prevents you from digging out the entirety of the thinset while cleaning.
5. Use the Right Thinset Color
Thinset typically comes in white or gray. Your choice will depend on the grout color you’re using— the idea here is to make sure they match. No matter how much you clean your grout lines while you’re tiling, the thinset will most likely show through the grout, and if you use a dark color, it will probably stand out.
If you’re not sure what color grout you’ll be using, it’s best to go with white thinset.
6. Use an Old Toothbrush
Many people prefer to use an old toothbrush to clean the grout lines of the thinset while tiling. Toothbrushes are readily available and make for better tools than you’d think: their head is small enough to fit between the spaces and clean up the mortar.
Using an old toothbrush to clean while you tile is quite easy. First, lay the tile. When you see thinset seep between the crack, dip the toothbrush in water and scrub it away.
Don’t forget to rinse the toothbrush thoroughly between each cleaning. Otherwise, you could reintroduce thinset to the grout lines.
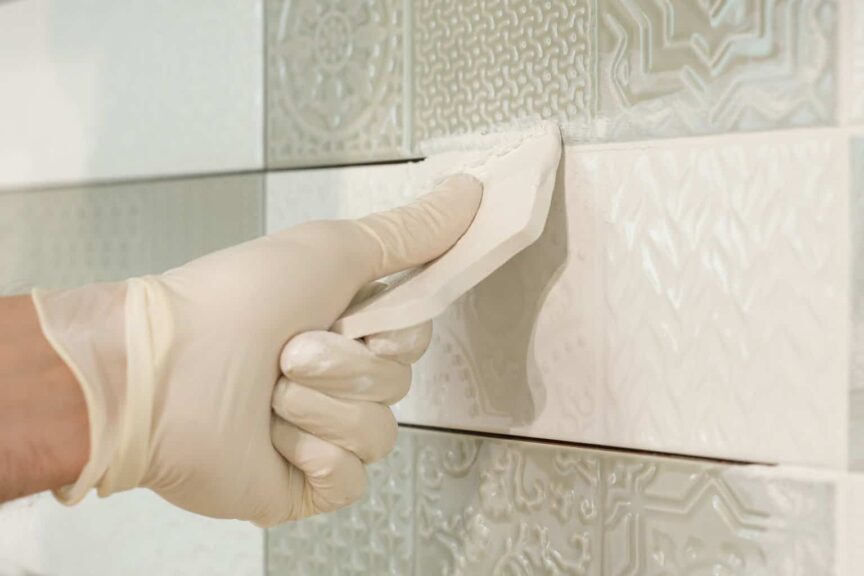
7. Use a Utility Knife
While it’s best to clean the grout lines before the thinset has time to harden, it doesn’t always work out that way. You may miss a few tiles while cleaning or don’t clean the grout lines enough.
If the thinset hardens and you need to clean it out, I recommend using a utility knife, such as the Spec Ops Utility Knife (available on Amazon.com). The best way to go about it is to use the knife to cut at the edge of the thinset and slowly work it up.
While using a utility knife during the actual tiling won’t work as well as a toothbrush would (when the thinset is wet), it’s the best option for hardened thinset.
Conclusion
Tiling doesn’t have to be challenging. As long as you have all of the tools you need and the knowledge to get it done, it can be a breeze.
Cleaning the grout lines while tiling is crucial, albeit tedious. However, there are many steps you can take to ensure your grout lines stay clean:
- Use the right amount of thinset.
- Ensure the thinset is spread evenly.
- Use tile spacers.
- Have a sponge handy.
- Use white thinset.
- Clean with an old toothbrush.
- Use a utility knife for hardened thinset.
Sources
Share this Post
Giovanni Valle is a licensed architect and LEED-accredited professional and is certified by the National Council of Architectural Registration Boards (NCARB). He is the author and managing editor of various digital publications, including BuilderSpace, Your Own Architect, and Interiors Place.