Expanding foam is a useful product designed to create insulation on open spaces, such as a crack or gap, often in hardware applications. These foams are typically dispensed in a white to yellow shade, which may not match the areas you apply them. Painting your expanding foam helps to blend in repairs you don’t want attention drawn to.
These are the 6 steps to painting expanding foam:
- Allow expanding foam to dry and settle
- Cut and sand excess expanding foam
- Remove dust and debris from the surface
- Choose an appropriate paint and application method
- Apply the first coat of paint
- Add additional coats of paint after drying
Expanding foam is simple to paint, but carefully following these steps will allow you to achieve the most finished look for long-lasting results. It is also completely safe to do as long as you are using personal protective equipment. Careful application of the foam and finishing beforehand will make the foam easier to paint and blend into nearly all surface applications.
Can You Paint Expanding Foam?
You can definitely paint expanding foam, often with varying levels of difficulty depending on the foam that is used and the area of coverage. Once the foam has dried and settled, it can be safely and effectively painted. Carefully following the steps below will allow for the most durable and aesthetically-pleasing results.
1. Allow Expanding Foam to Dry and Settle
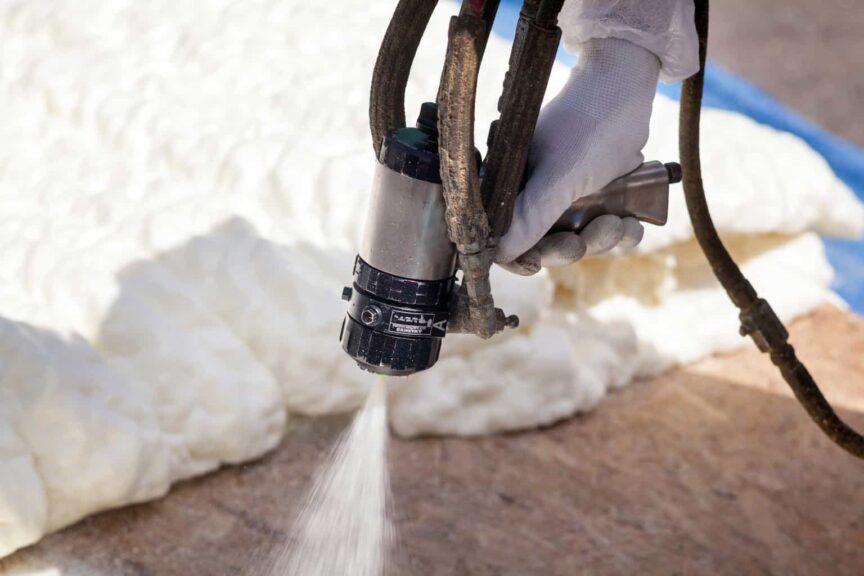
Expanding foam is a product that is released from a pressurized can or bottle and expands once it makes contact with the air. Through this process, it begins to harden and settle, allowing spaces to be filled. They do come in multiple types, so you will need to select one based on your space and its location. Expanding foam can be found in high and low expansion forms.
After applying the expanding foam to an area, you will need to allow for it to dry completely before any alterations or painting can be done. For most expanding foam products, the surface will be tack-free or sealed after around 30 minutes. This is the amount of time it takes for the foam to be fully expanded and be nearly dry and free of moisture on the surface.
This is different from cure time, which is the amount of time that the foam should rest before the area is fully set and hardened. You should not make any changes to the expanding foam before it has cured. Cure time for expanding foams is typically over 8 hours, depending on the product variety.
It’s best to wait a full 24 hours before manipulating or painting expanding foam because it far surpasses the necessary cure time and allows for full settling and drying.
If you want to speed up the process and cure time, added moisture will help. The presence of moisture is quickly absorbed by the polyurethane foam to expand more quickly and therefore start the curing process. Lightly spray some water on the surface you will be applying foam to or in between foam coats for quicker curing.
2. Cut and Sand Excess Expanding Foam
Once the expanding foam has fully settled, you will want to examine the results. While the foam will properly seal the desired area, it may look uneven at the surface as it can expand unpredictably. This is the time when you can cut and sand the edges to make it look more uniform, which will also make it easier to paint.
Whenever you are removing expanding foam, you will want to wear personal protective equipment, which especially includes a mask and goggles. This will protect you from small particles that could be inhaled or get in your eyes when removed. The polyurethane foam is toxic when consumed and is a particular concern for those with respiratory issues or asthma.
To trim or cut your foam insulation, you can use a utility knife, butter knife, or a hand saw depending on the thickness of the application. Smaller knives will be easier to use in smaller corners that may not be accessible with larger saw tools. Expanding foam should be cut following these techniques:
- Cut close to the surface: You will want to trim closely along the surface of the covered area to remove as much excess foam as possible without cutting into the filled section. The type (and sharpness) of knife to use will be based on the strength of the foam.
- Smooth strokes: Try to smoothly cut along the surface to disrupt the filled area as little as possible. This will also make it easier to finish with sandpaper. Serrated edges on knives can help to cut through the foam more easily.
- Cut away from your body: If possible, cut in a direction away from you so that if there is a section that requires more force, it won’t jerk towards you and cause possible injury.
After you have safely cut down the excess foam, consider using sandpaper to smooth the area or remove additional foam material. You will want to use coarse sandpaper on the surface and apply lightly for best results. Consider 80 to 120-grit paper for smoothing. The goal is to make the area smooth without removing foam below the surface level.
3. Remove Dust and Debris From Expanding Foam Surface
After sanding, you are likely to be left with a lot of dust and debris. Not only is cleaning the nearby area important, but you will need to clear the surface of the foam for the best paint adhesion. You can do this in a variety of ways for successful clearing. For waterproof expanding foam, wipe the area down with a damp cloth to remove extra debris and then let dry.
If you don’t want the surface to get wet, you can wipe the area down with a dry cloth or use air to remove debris. Consider blowing pressurized air at the surface to remove dust or a vacuum to suck up the extra foam particles. Any of these methods will help you to remove dust that will make your paint harder to set or allow for more visible bumps and imperfections to appear.
You should still be wearing protective equipment during this step to make sure that none of the particles are inhaled. Ventilating the area will also help to move the particles from lingering in the air.
4. Choose an Appropriate Paint and Application Method
After you’ve fully prepared the cured expanding foam, it’s time to look at starting the painting process. Choosing an appropriate paint will depend on the location of the foam, whether that be interior or exterior applications. Exterior paints will be more durable for varying weather conditions. The composition of the paint also matters, so it doesn’t compromise the foam.
For painting expanding foam, you should only be working with latex or water-based acrylic paints. These will adhere more successfully and protect the foam from additional damage. Many outdoor applications recommend painting even if you don’t plan to for additional durability. Do not use solvent or oil-based based as they will break down and destroy the foam.
After selecting the type of paint, you will need to choose an application method. The most common methods include:
- Spray paint: For larger surface areas, spray paint will be much easier and allows for an even finish. Because foam can still look fairly uneven, the spray paint easily coats any bumps and ridges without clumping. For larger areas, consider investing in a spray gun (especially if you’ll be working on multiple projects).
- Paint rolling: If you don’t want to work with aerosols for larger areas, a paint roller is an easy alternative. If the surface is not perfectly smooth, you will see variations.
- Hand brushing: Small hand brushes can be applied to the foam, but they may not provide the most even finish, especially on areas that are not perfectly even. They are a great choice for small and precise applications
You can find water-based acrylics and latex paints in both spray paint and canned paint forms. All of the application methods are compatible with these types of paint. Try to use a flat paint as ones that are much glossier will point out imperfections and bumps much more easily.
5. Apply First Coat of Paint to Expanding Foam
Paint should be applied in light and even coats for the best drying. Your first coat will provide a foundation for full coverage. Make sure that you cover all the areas and leave no foam exposed. This will make future coats easy to apply and allow for consistent color coverage as well as protection.
Be Patient: Your expanding foam may also have imperfections on the surface, especially if you did not fully sand. When applying a heavy first coat, it will be difficult to fully dry and will result in a ‘pooled look’ once it does dry. Patience on the first coat will make it easier to add more layers and give you the full coverage you are looking for.
Water-based and latex paints do have a fairly quick drying time, allowing you to add a second coat on the same day. It’s best to wait at least 5 hours to make sure the paint has completely set. This drying time will vary from paint to paint, so make sure you look at the recommended instructions.
These are some techniques to make your paint dry faster for a quicker project:
- Ventilation: Exposure to air and good ventilation will allow for faster drying. Consider using a fan if the area does not naturally have this exposure. Most foams are also heat resistant, so you can apply heat for faster paint drying time.
- Keep dry: While moisture and humidity will help the expanding foam dry faster, it is not your friend for drying paint. Moisture will dry the paint at a much slower rate or result in uneven texture. To avoid this, keep windows and doors open or use a dehumidifier near the area.
- Paint choice: Some acrylic paints are designed to be faster drying than others. You can choose fast-drying paints if needed. This may impact the quality and characteristics of the paint.
- Temperature: For exterior applications, you will want to make sure that the outdoor temperature is suitable for proper drying. It is recommended to apply paint in temperatures above 50 F as paint does not dry well in cold environments. Paints usually dry well between 50 – 90 degrees F.
You should consider letting the paint dry for longer than the recommended drying time to account for a coat that may be thicker. This time will vary based on the brand and type of paint that you select.
6. Add Additional Coats of Paint to Expanding Foam
Adding additional coats of paint is important for both appearance and durability. Multiple coats will help to properly seal the foam, especially for outdoor applications that are subject to weathering. Once you have allowed for the first coat of paint to dry, you can add another thin layer. For full coverage, 2 to 3 coats with acrylic and latex paints is recommended.
The second coat should be applied the same way as the first to ensure uniformity and avoid noticeable variations. This includes not only the technique but also the thickness of the coat. Once this second coat dries, wait the suggested time and apply a final layer if needed. The multiple layers should eliminate most imperfections and allow for a sealed and finished look.
If desired, you can also add a seal or varnish on top of your acrylic or latex paints. Acrylics typically use varnish to seal, while latex paints don’t usually add a sealant. You can add a clear topcoat to latex paints for additional protection and a glossy finish.
These foam areas will now be properly sealed and look great. If you need to do any touch-ups, you can add more foam and then repeat the steps above.
What is Expanding Foam Used For?
Expanding foam has many applications that can be easily painted and finished. These are not only used to fix repairs, but also make surfaces more secure. These are some of the most common uses for expanding foam:
- Closing exterior holes and openings: If you have holes that lead to the outside of the houses, these can be easily filled with foam. This may be particularly important if you are worried about small animals and pests.
- Seal a door or window: If doors or windows don’t perfectly fit in a doorway, they may be letting additional air through. This can create unwanted drafts or allow water to come through with excess rain or flooding. Expanding foam can be a great temporary fix for many of these larger issues.
- Filling holes or gaps: Expanding foam can also be successfully used to fill cracks and damaged areas as well as needed gaps. The foam will properly expand to the odd openings for greater security.
- Holding fixtures tightly in place: If you have a wobbling or unsteady fixture in your home, you can reinforce it with expanding foam. This will keep it sturdy and prevent items from falling or breaking. This is often done on showerheads, faucets, and toilet plumbing.
- Home insulation: Expanding foam can also be used to insulate a house for better temperature regulation than traditional fiberglass. You typically won’t see or have to paint it when it is located inside the walls.
Painting your expanded foam will not only help to add an additional layer of sealant, but it will make foam applications less obvious when blended in.
Where Should You Not Use Painted Expanding Foam?
While expanding foam has many of the useful applications mentioned above, it should not be used everywhere. Keeping both the chemicals in the expanding foam and the paint away from dangerous areas will prevent accidents and explosions.
These are the places that you should not use expanding foam:
- Too close to light fixtures: The close proximity of the foam and heat from the lighting could pose risks related to fire. Expanding foam is particularly flammable while being dispensed, so make sure that there are no heat or fire sources in any application.
- Near an electrical box: These flammable chemicals should not be too close to an electrical source to prevent fire. There is also a risk of foam over expanding and interfering with wiring.
As a general rule of thumb, you will want to keep expanding foam away from power sources and any flammable areas. This will help to prevent fire and other chemical reactions. The paints themselves are not flammable as they are water-based, and latex is not a highly flammable substance.
Most applications of expanding foam and painting the dried results will be safe. As long as you are using proper protective equipment to avoid contact with your eyes, nose, and mouth, painting your expanding foam can be an easy project to make improvements and needed fixes around a home or job site.
Share this Post
Giovanni Valle is a licensed architect and LEED-accredited professional and is certified by the National Council of Architectural Registration Boards (NCARB). He is the author and managing editor of various digital publications, including BuilderSpace, Your Own Architect, and Interiors Place.