Homeowners are always looking for home improvement ideas that will add comfort and value to their home. One major area of consideration is insulation in the walls. With many advances and variations in insulation over the years, you might have found yourself curious about expanding foam insulation.
Can you use expanding foam in cavity walls? Yes, you can use expanding foam insulation in cavity walls. Expanding foam insulation has increased in popularity as the manufacturers have praised its uses and abilities, and its applications have reached to include cavity walls.
What Is a Cavity Wall?
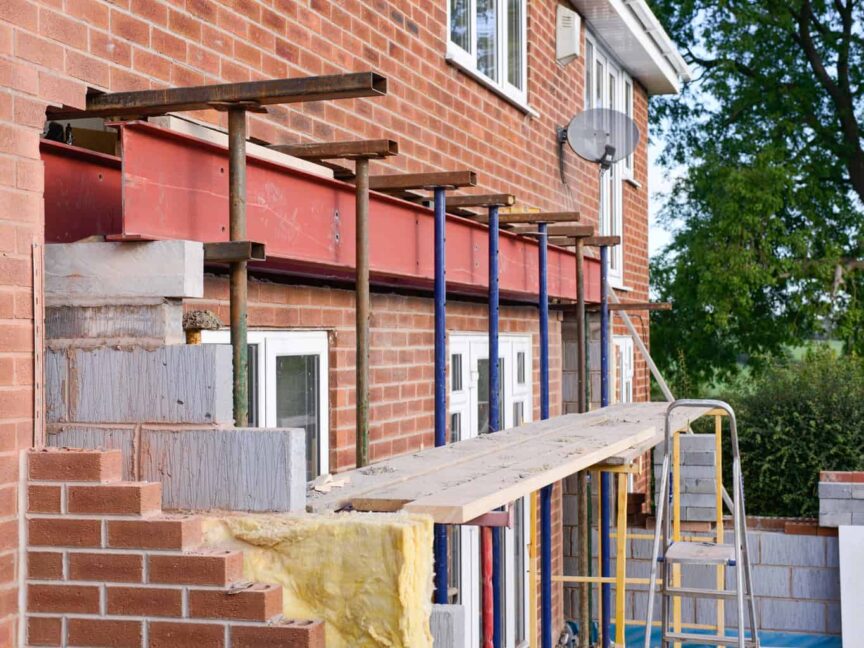
A cavity wall is a double-layered masonry wall on the exterior of a home. These walls are distinct because they will have one layer of brick as the “external wythe,” a gap with air or insulation, and then an internal layer, the “interior wythe.”
These wall designs are found in brick homes built after the 1920s and make up a large percentage of brick homes. The design helps to pull moisture away from the inside of the house, allowing it to flow from “weeping holes” at the wall’s base.
The design was also meant to insulate from noise and the elements. However, depending on your climate, some cavity walls do better than others. Some homeowners choose to add insulation to the gap or replace old insulation during remodeling.
What is Expanding Foam Insulation?
In essence, expanding foam insulation is a material that is sprayed into a space. As the insulation expands or swells, it sets. The foam forms itself to the area that it is sprayed into, filling even the tightest of spaces.
There are two types of expanding foam insulation: Open-cell and closed-cell. Closed-cell is usually used for commercial projects. Open-cell is commonly used for residential insulation, but sometimes exceptions are called for.
There are also two installation methods that we will discuss more a little later. They are injection foam and spray foam, and each has its specific applications.
Why It Matters
Insulation is vital to help keep out the elements and noise, as well as keeping the desired environment inside of the home. If there is an air leak, the environment you want inside your home is disrupted by the climate outside. This means that your heating and air must work more frequently, wasting energy and money.
Replacing insulation helps to fill the gaps in the walls and keep the desired environment within the home. When you’re looking for new insulation to fill all those places, you’ll undoubtedly come across expanding foam insulation.
There are two methods of installing foam insulation, and we will cover each one. The first is spray in, and the second is injection.
Injection Expanding Foam
Injection expanding foam insulations is a bit different than spray foam and more complicated. The process is also more involved and can take longer to finish. It involves hoses running down through cavity walls through holes drilled near the top of the level and injecting a lower expanding foam into the wall.
For cavity walls with an empty space between the leaves, the process differs slightly. However, if there is already a layer of insulation installed, it does not need to be removed before using the injection foam. The foam will compress the fiberglass insulation while filling in the spaces around it.
Each contractor will have their different methods, so it is good to discuss how invasive the procedure will be as to avoid any surprises. A good contractor will leave the outside of the home looking just as good as they found it.
1. Drilling the Entry Point
The first step involves drilling the hole where the hose enters the cavity wall. This is done at every single stud cavity, or empty space between the studs if studs are present. Sometimes this is done at up to three spots per level, meaning at the top, middle, and bottom of the wall for each cavity space.
2. Inserting the Hose
The hose that will carry the insulator is inserted into the wall. The foam is usually sprayed from the ground level first, moving up the wall.
3. Injecting the Foam
Once the hose has reached the bottom of the cavity, the foam is injected. As it flows, the contractor will slowly pull the hose up and out of the cavity to ensure the foam is evenly distributed, and no spaces are left.
As the cavity fills, they will remove the hose and start injecting from a higher point if they used a multiple hole method. If they used a single hole, they would reinsert the hose in an upward direction until it reaches the top of the wall. The injection continues as they slowly pull the hose out once more.
This process is repeated several times for each wall. This is important to ensure there are no voids or gaps between foam injections. Any spaces left behind will be a point for the heat or cool to escape the home.
4. Finishing Touches
The contractor will top off the hole and let it set. After it is set, a spot in the mortar is cleared for the new mortar to be put in place. This makes it look as if there was never a hole drilled at all.
Spray in Expanding Foam
Spray in is exactly how it sounds. It is sprayed into the wall space using a pump. Different chemicals are sent through a line to a spray gun and combined, then sprayed directly into the open wall spaces.
After spraying, the foam expands and fills the available space in the wall. However, this method can only be used if there is open access to the cavity. It is generally used for unfinished walls before the drywall goes up.
Pros and Cons of Expanding Foam in Cavity Walls
Pros:
- Reduces utility use, which saves money over time
- Can add value to the home
- Creates a nearly air-tight seal
- Protects from moisture and air leakage
- Helps keep pests out by sealing up small entryways
- Can be used with old fiberglass insulation that may be in place
- Helps to reduce mold and mildew growth
- Adds extra strength and support to the walls
- Doesn’t lose R-Value over time, meaning it is consistent in its level of heat transfer
- Adds sound dampening to the walls, significantly reducing the noise that will come through
Cons:
- When improperly installed, gaps can be created that increase the likelihood of water damage
- If the foam mixture is not exactly right, the foam cannot form properly and can shrink as it dries, causing significant gaps to form
- The R-Value of spray insulation may not meet your building code requirements
- It takes time to cure. This coupled with the smell and gasses released with some products means you may not be able to be in your home while it is curing
- It is expensive. You are paying for not just the product, but the experience needed for proper, high-quality installation
Other Important Notes
Before expanding foam insulation is used, you must know what is in the wall and how it is constructed. If there are unknown spaces or blockages, the foam will not be as effective. A detailed inspection should always be done before beginning.
If there is any access to interior walls through cable runs, plumbing, gas lines, or weeping holes, these will need to be blocked off to avoid accidental overflow.
Likewise, any outlets that access the cavity wall will require special attention. Expanding foam can cause trouble if it expands into an electrical socket.
Conclusion
Expanding foam can be used effectively as cavity wall insulation. With proper installation from a knowledgeable, experienced contractor, your home could be more insulated and quieter than ever before.
Share this Post
Giovanni Valle is a licensed architect and LEED-accredited professional and is certified by the National Council of Architectural Registration Boards (NCARB). He is the author and managing editor of various digital publications, including BuilderSpace, Your Own Architect, and Interiors Place.