Damp proofing keeps out soil moisture from the foundations of buildings, protecting against problems a damp building can cause. If you’re thinking about damp proofing, you’re also probably wondering what the regulations are concerning this.
Damp proofing requires building regulations for new construction and alterations of habitable spaces where the walls or floors are in contact with the earth. This applies to walls and related portions that retain earth and enclose interior spaces and floors below grade.
There are many more questions around damp proofing that you should consider. You will need to know why you need damp proofing and the difference between damp proofing and waterproofing, among other things. We’ll cover everything you need to know about damp proofing your home or business.
Why Do You Need Damp Proofing?
Soil carries moisture. Moisture can ruin your building foundation and even cause you health problems.
You need damp proofing for numerous reasons, including:
- Expensive Fixes for Moisture Problems
- Health Problems Related from Mold or Mildew
- Moisture Control
Damp proofing is an inexpensive way to head off future problems. If you build on soil, you will need to consider damp proofing.
1. Expensive fixes for building problems
Moisture problems are expensive. They can include health costs and building damage. These unnecessary costs can include the following:
- Loss of use of building spaces after damage and during repairs
- Increased insurance risk
- Reduced productivity due to moisture-related health and comfort problems
- Absenteeism due to illnesses such as asthma
- Increased insurance and litigation costs
- Repair and replacement costs associated with damaged furniture or products
- Frost damage to building
- Electrical damage
- Poor performance of insulation
Most home and building insurance policies will not cover you for damage caused by damp and condensation. If your home or building is not damp proofed, you could end up with large bills you cannot pay. It’s much better to pay a little up front than a lot in the long term.
2. Health Problems Related from Mold or Mildew
Exposure to damp or moldy environments may cause a variety of health problems. They can also exacerbate a number of existing health issues, especially if you have asthma or serious allergies.
Health problems related to mold or dampness include:
- Eye irritation
- Nose irritation
- Lung irritation
- Throat irritation
- Asthma attacks
- Shortness of breath
- Slipping due to damp patches
Some people can be seriously compromised by mold or mildew in the home or business. These people can include:
- Infants
- Children
- Elderly
- People with compromised immune systems
- People with chronic lung disease
Mold or mildew can even cause lower respiratory problems in otherwise healthy children. It’s far better not to have to deal with any of these health-related issues. Damp proofing can help with that.
3. Moisture Control
The first principle of moisture control is to keep moisture out of buildings. Damp-proof coatings on below-grade walls serve the same purpose as the drainage plane in the above-grade walls. The coating provides a capillary break that excludes the rainwater that saturates the surrounding fill.
How do you know if you have a moisture control problem? Here are some typical symptoms of moisture problems:
- Corrosion of metals
- Growth of surface mold
- Growth of wood-decaying mold
- Insect infestations
- Spalling exterior brick or concrete
- Peeling paint
- Failing floor adhesives
- Stained finishes
- Health problems
- Rotting wood
Any of the above problems can indicate a serious issue you will need to solve. Damp proofing at the beginning of construction can help you with this.
Types of Damp Proofing
So, you know why you have to damp proof but you may wonder how you need to damp proof. Well, there are numerous ways you can damp proof, including:
- Damp Proof Course
- Damp Proof Membrane
- Integral Damp Proofing
- Surface Suppressant Coating
- Cavity Wall Construction
1. Damp Proof Course
A damp proof course is a barrier through the structure designed to prevent moisture rising. This barrier can be a special type of cream put in regular, drilled holes in the wall to create a membrane.
Moisture can rise through the soil into the property. A damp proof course can be horizontal or vertical, depending on the needs of the structure. A layer is usually laid below all masonry walls.
2. Damp Proof Membrane
A damp proof membrane is a membrane material applied to prevent moisture seepage from soil to building. One common example of this is polyethylene sheeting that can be laid under a concrete slab to prevent the concrete from gaining moisture.
3. Integral Damp Proofing
Integral damp proofing involves adding materials in concrete mix to make the concrete waterproof from moisture in the soil.
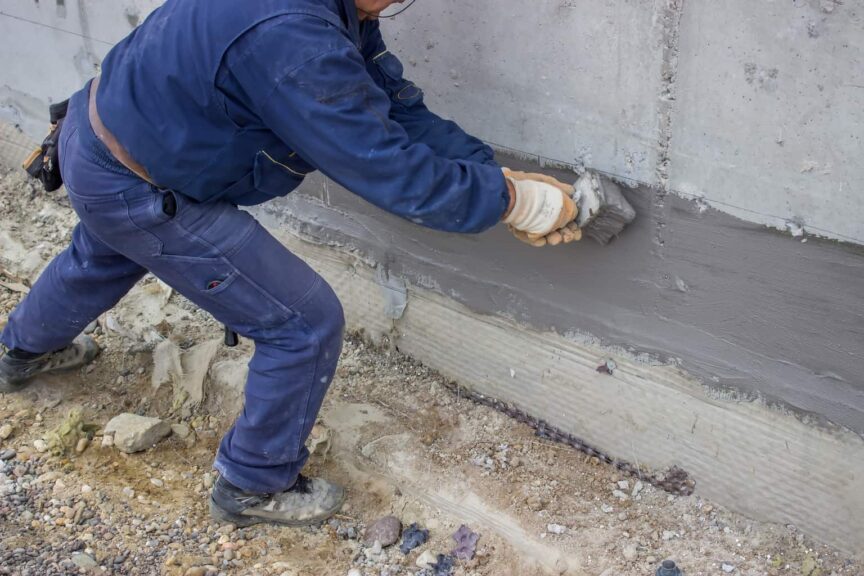
4. Surface Suppressant Coating
Surface suppressant coatings are waterproof materials such as epoxy resin coated on a material to make it impervious to rainwater and moisture in the soil.
5. Cavity Wall Construction
In cavity wall construction, like rainscreen construction, the internal walls and the exterior walls are separated by a cavity. This cavity helps create a barrier that keeps the moisture from reaching the interior walls.
DIY Internal Damp Proofing
Although we do recommend you consult a professional for damp proofing, you can damp proof your building yourself to save money. We’ll help you and go over a few methods of damp proofing, including:
- Using a Damp Proofing Membrane
- Applying Surface Suppressant Coating
- Injecting a Damp Proofing Cream
1. Using a Damp Proofing Membrane
Damp proof wall membranes are made from either sheets of Polyethylene or Polypropylene. Each sheet has a thickness of 0.5 mm to 1mm. The membranes are cut to size and fixed to walls and doors to prevent damp transferring to internal finishes.
Once installed, the membrane provides a type of cavity known as an air gap that allows moisture to evaporate from the wall unhindered.
One Note: Remove the cause of the damp walls first. Resolve the underlying problem before damp proofing your internal walls.
To install the damp proofing membrane:
- Remove the old plaster, sheetrock or any deteriorating surfaces
- Cut the damp proofing membrane down to size
- Neatly fold the damp proofing membrane around the corners
- Drill, then fix the damp proofing membrane to the walls ensuring a tight fit
- Apply wall finish to the damp proofing membrane
You can often find a damp proofing membrane kit at your local hardware store with all the tools and materials you need.
2. Applying Surface Suppressant Coating
Surface suppressant coatings are non-toxic products such as epoxy or paint that can be applied to surfaces to act as a barrier to moisture. It has a thick consistency and usually comes in black or white.
To apply the surface suppressant coating:
- Identify and fix the underlying problem
- Allow the wall or surface to dry completely – you can use a dehumidifier and increase ventilation
- Repair any damage before applying
- Clean the affected area
- Apply coating to the surface using roller or spray
- Let dry completely
- Apply another coat
- Once it dries, you can paint over with any emulsion-based paint
Pro Tip: Do not try to cover too large of an area. That indicates a bigger problem. Check with your local contractor.
3. Injecting a Damp Proofing Cream
A damp proofing cream can create a damp proofing barrier to keep moisture outside of your building. This is also known as a damp proof course. To protect your building with a damp proofing cream, you will need the following:
- 8 cartridges of professional damp proofing cream
- 12 mm x 160 mm drill bit
- 12 mm x 250 mm drill bit
- An extension tube
- A heavy-duty caulk gun
- A pair of protective gloves
To inject the cream into your walls:
- Drill a 12 mm hole in the masonry
grou t, 90% through the wall - Drill holes along the bed joint
- Holes should be 100-120mm apart
- Inject sufficient cream to fill the holes to within 1 cm of
wall surface - Leave the cream to diffuse through the wall, cure, and form a damp proof course
- Finish the drilled holes with sand or cement
- Replaster or paint to complete the look
Other items to remember when installing a damp proof course are:
- Must be continuous with any damp proof membrane in the floor
- Must be at least 150 mm above the level of the ground if it is an external wall
- If an external cavity wall, cavity should extend at least 225 mm below damp-proof course
Pro Tip: When damp proofing a solid wall, you can drill and inject from the most accessible side. When treating cavity walls, drill and inject both inner and outer walls to form a damp proof course in each.
Items to Remember in Damp Proofing
Even when you damp proof, you need to be sure that other factors are in place so that your damp proofing will do its job. Some items to remember as you damp proof include:
1. Proper Surface Drainage
- Correctly Installed Foundation Drains at Footing
- Absence of Hydrostatic Pressure to Drive Water Infiltration
We’ll go through these so that you know what to do.
- Proper Surface Drainage
Keeping water drained away from home or business foundations is important for three reasons:
- Dry living or working space inside
- Soil needs to stay at a consistent moisture level to prevent settlement or movement
- Drains are required by building code
Controlling surface water is critical to controlling soil moisture beneath the foundation. The ground surface should slope away from the building at between 1/2 and 1 inch per foot for at least 6-10 feet.
Pro Tip: Be careful of poorly compacted backfill. It could mean the surface will soon slope back towards the building.
2. Correctly Installed Foundation Drains at Footing
Drainpipes should be positioned alongside the footing of the building. A footing drain system carries rainwater and ground water away from the footing and the floor slab. The best spot for this is near the base. Low spots should be avoided.
Did you know? Drainpipes or tile are perforated plastic drainage pipes, so the water can escape back into the soil. The pipe or tile should be placed perforations down in the soil.
You can only skip this item if a certified hydrologist or soil scientist has determined that the building foundation is in well-drained ground or a sand-gravel mixture soil.
3. Absence of Hydrostatic Pressure to Drive Water Infiltration
Hydrostatic pressure refers to the pressure of the water in the soil around your building. Water weighs a little more than 60 pounds per cubic foot. If the soil around your building is saturated with water, there could be thousands of pounds of hydrostatic pressure against your foundation.
To relieve hydrostatic pressure around your building, the most popular method is to install a deep channel drainage system along the perimeter of your foundation or footing.
You can also use a sump pump to move the water from around the building to a drainage area.
When to Damp Proof Rather than Waterproof
There is a big difference between damp proofing and water proofing. It’s easy to tell the difference. Damp proofing keeps out soil moisture while water proofing keeps out both liquid water and moisture.
Local conditions will determine whether you should damp proof or waterproof. Damp proofing conditions include the following:
- Low water table
- Well-drained soil
- Drier climates
- Lower depth of foundation wall
Water proofing conditions include the following:
- High water table
- Severe soil-water conditions
- High annual rainfall
- Higher depth of foundation wall
Both damp proofing and water proofing could apply to the following construction types:
- Enclosed interior spaces
- Enclosed interior floors
- Crawl spaces
When in doubt, check with a local trusted contractor, who can tell you which one you should apply to your construction.
Do You Have to Damp Proof?
Damp in older buildings could be caused by a leak or a crack in the wall construction rather than by rising damp caused by soil. If so, damp proofing your building will not work. It’s important to identify the cause of the moisture in your building before undergoing expensive repairs.
In many cases, damp in buildings can be solved with some basic home maintenance and some lifestyle changes. You may want to try the below first and see if it corrects the problem before going further:
- Air out your home regularly – open your windows
- Heat every room of your house – unheated rooms lead to cold spots, which are more susceptible to damp
- Make sure air can circulate freely around your home – avoid putting furniture directly against your walls
- Check your gutters and drains to make sure they’re not blocked
- Make sure your washing machine and dryer are externally ventilated
- Check your roof for missing roof tiles or shingles
- Wipe condensation from windows as they appear – don’t leave condensation to evaporate internally
- Close your kitchen doors when cooking and close your laundry room door when doing laundry
- Feel the walls regularly – this is where you will first notice dampness and moisture
- Check the bottom of your external doors for rotting – if rotting, get weather stripping
- Close the door when taking a bath or shower – moisture can and will escape from the bathroom
- Dig away dirt that butts up against your exterior walls
- Check around fireplaces for damp spots
- Check your window frames for peeling paint or rot – treat immediately if seen
- Insulate your pipes to prevent them freezing in cold weather or attracting condensation
- Check your insulation to make sure it’s dry and correctly installed
- Check the trees around your building – trees should be no closer to the foundation than their eventual height
- Seal cracks immediately after noticing them
Sometimes simple fixes can be the best solution to avoid a costly problem.
Drawbacks of Damp Proofing
Damp proofing will not solve your moisture problems if there’s a bigger issue at hand. In fact, it could be a drawback.
Some issues of damp proofing include:
- Inability to Seal Larger Cracks
- Won’t take care of large holes
- Won’t correct holes left by form ties
- Will not correct surface protrusions
- Won’t correct problems caused by coarse or careless backfill
Some features of damp proofing that may not fix your problem include:
- Less than 10ml when cured
- Unable to permanently resist water flow under hydrostatic pressure
- Brittle at low temperatures
- Little to no crack bridging ability
The Final Word on Damp Proofing
Damp proofing may be the easiest way to get rid of dampness in your building. Comparatively speaking, it costs less than other methods to remove damp and moisture from your building. It’s also less time-consuming and less prolonged when compared with other methods.
Damp proofing is not intended to keep all water and moisture out of the building. The goal of damp proofing is to repel water infiltration by blocking the capillaries of the building material, slowing water penetration.
However, when used in conjunction with the proper techniques, such as surface drainage, to repel rising damp and moisture, damp proofing can supply adequate, long-lasting protection.
Share this Post
Giovanni Valle is a licensed architect and LEED-accredited professional and is certified by the National Council of Architectural Registration Boards (NCARB). He is the author and managing editor of various digital publications, including BuilderSpace, Your Own Architect, and Interiors Place.