In the wake of high household mortgage debt and the recent emphasis on green building, many Americans are turning to sustainable, cost-effective ways to build a home mortgage-free. As a result, cordwood construction is increasingly becoming popular. But while it’s widely touted to be “as simple as stacking firewood in a woodpile,” it takes a deep understanding of the best practices for cordwood construction to build a great-looking, structurally-sound house.
The best practices for cordwood construction are choosing the right mortar mix, using the right foundation construction technique and large roof overhangs, choosing the right wood type, and control rotting – all while conforming to the building codes in your area.
Read on for more details on cordwood construction and the best practices for building a structurally-sound house using this method.
What Is Cordwood Construction, and How Is It Different From Conventional Log Masonry?
Cordwood refers to an ancient construction method dating back to over 1000 years ago. Its earliest forms trace back to Greece and some parts of Europe, but the modern version of this building technique became popular in the 1800s.
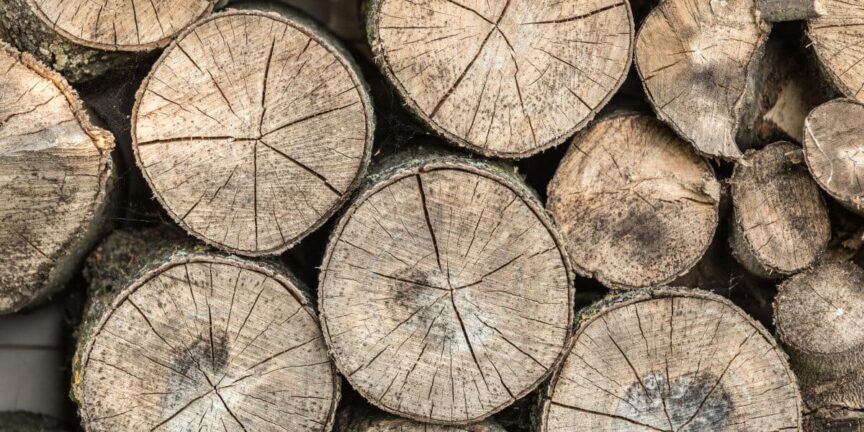
Put simply, cordwood construction is where logs of the same length are laid in a bed of mortar and insulation to create a wall. But unlike in traditional log masonry, where the grain of the wood runs along the length of the wall, the grain in cordwood masonry faces out. In other words, you see the cut end of each log in a cordwood wall when looking at it (as opposed to how you’d see the whole length of the wood in a conventional log wall).
Due to its great insulative characteristics, and structural excellence, and cost-effectiveness, cordwood masonry is increasingly becoming a popular option for DIY builders, particularly those looking to build mortgage-free.
But to build successfully using this technique, you need to know and utilize the best practices for building with cordwood.
Let’s review them below.
Choosing the Right Cordwood Mortar Mixture
Choosing the right mortar mix is important because the kind you choose may have an impact on the structural characteristics of the resulting building and the operational efficiency of your construction process.
Some of the commonly used mortar mixes include:
- Traditional cordwood mortar (lime, sand, portland, and sawdust)
- Cob mortar (straw, clay, and sand)
- Papercrete mortar (lime, sand, and paper)
- Lime putty mortar (sand, water, and lime)
- Cellulose mortar (cellulose, sand, and lime)
There isn’t a single “best” mortar mix for every construction project. Perhaps the only factor you should consider is the climate in your area because some of these mixtures are climate-specific.
For instance, you might want to avoid papercrete if you’re building in wet conditions because it doesn’t have the best moisture resistance and may disintegrate when exposed to water for extended periods. And while it has great fire resistance, it expands and contracts rapidly when exposed to extreme temperature fluctuations, leading to cracks and/or buckling.
On the other hand, lime putty mortar may be affected by temperatures below 5°C (41 °F). With that said, there’s a growing preference for this kind of mortar among DIY builders, mainly because:
- It’s simple to mix.
- Unlike traditional cordwood mortar, it can “self-heal” small cracks. When small cracks form on lime mortar, the action of free lime causes them to recrystallize, effectively sealing the cracks.
- It takes longer to set than many other types of mixes, which gives builders more time to “point” (AKA smooth) the mortar and correct any design mistakes in the wall. Even when building in extremely hot and dry climates, you can still smooth the mortar the next morning after it has sat in the sun for a whole day. This comes in handy when you don’t have enough time to “point” immediately.
- When it sets, lime putty mortar is brighter in color than a conventional portland mix. The former leaves behind a whitish wall, while the latter results in a more grayish one.
Using the Frank Lloyd Wright Rubble Trench Foundation
Another best practice when building with cordwood is to choose the increasingly popular Frank Loyd Wright rubble trench foundation. Popularized by the man it’s named after, this type of method utilizes a gravel trench to prevent water from settling under a building’s foundation. In doing so, it helps protect a building against frost heaving, saving on construction costs and providing a type of foundation that suits a wide range of soils and climates.
To create a rubble trench foundation, a trench footer is dug to frost depth, continuously running around the perimeter of the structure. Next, the trench is filled with gravel before being reinforced with a structural (typically concrete) grade beam. The concrete grade beam usually sits on top of the gravel-filled trench, and its main purpose is to evenly distribute the building’s structural load across the surface area of the rubble trench.
The beauty of this foundation construction technique is that it combines two important requirements of a building foundation in a single system: water drainage and structural bearing. Usually, the structural bearing capacity of a rubble trench foundation depends on the width of the trench.
As for the drainage, it’s facilitated by the cavities between the gravel filling, and a filter fabric liner is usually installed between the stone and the soil to provide further protection against fine silt that may fill the spaces between the stones over time and compromise the flow of water.
Drainage is particularly important for any foundation system because water is the most common cause of foundation failure. Both liquid and frozen water can be problematic. The former can compromise a foundation footer (the part of a foundation that sits below ground level) by eroding the soil around it.
Frozen water, on the other hand, is the culprit behind the frost heaving phenomenon mentioned earlier. When it freezes, water expands, causing the ground around your building’s foundation to expand, too. This causes your building’s foundation to heave upward during winter and then drop back as a result of the ground thawing when spring comes around. This kind of movement in your foundation can cause cracks in walls or even uneven settling in a building.
By allowing water to flow through your foundation, Frank Loyd Wright rubble trench foundation eliminates such drainage issues and helps your building retain its structural integrity. Additionally, it’s eco-friendly, high-performance, and resource-efficient, all while being a low-cost foundation construction technique.
Interested in building a Frank Loyd Wright rubble trench foundation? Here’s a step-by-step guide:
- Dig a trench that’s 4 inches (10.16 cm) deeper than the frost depth in your area. Keep the slope of the trench a minimum of ⅛ inches (3.175 mm) per linear ft. The width can be 16” (40.64 cm), but you can adjust this to fit your building’s load and the bearing capacity of the soil in your area. Remember, the width of the trench determines the structural bearing capacity of a building.
- Line your trench with a filter fabric. This helps prevent fine silt from filling the spaces between the gravel you’ll use to fill the trench (see above for details)
- Fill the trench with up to 4 inches (10.16 cm) of gravel and tamp it down once (a hand tamper will cut it if you can’t find a pneumatic tamper). Make sure that the surface of the grave is at or below the frost depth and that it conforms to the drainage slope.
- Run a perforated pipe on top of the sloped gravel fill. The pipe should be at least 4 inches (10.16 cm) in diameter and sloped to daylight.
- Fill the remaining space in the trench flush to or just below grade. Use 1-5 inches (2.54-12.7 cm) gravel, and tamp it down (again, a hand tamper will do just fine) after each vertical foot of gravel fill. Tamping ensures that the stone pieces lock firmly together for a strong bearing that can resist shifting over time.
- Add a layer of biodegradable oil (any vegetable oil will do) over your formwork (for the grade beam). This facilitates an easy release of your formwork in case you need to reuse (for example, some builders use 2×12 wood for the grade beam shuttering and then repurpose it for structural framing after the beam has cured).
- Set the formwork for the concrete grade beam. If you’re not sure whether you’ll require a reinforcing steel bar inside to further strengthen your grade beam, consult with a structural engineer (it may be necessary to have an engineer tailor the structural requirements of your beam to your building’s load if you’re new to DIY construction).
- Lastly, pour in your concrete grade beam.
Few notes to keep in mind:
- The inclusion of the drainage pipe (in step iv. above) is optional because the rubble trench already provides drainage. But while it’s technically a redundant installation, it can be the deciding factor in getting a building permit in some jurisdictions (check your local building code for clarification).
- The rubble fill doesn’t always have to be stone (i.e., gravel): crushed concrete will do. But in both cases, the fill must be of varying sizes averaging 1 to 1.5 inches (2.54-3.81 cm). It should also be washed to get rid of fines (including sand) that may interfere with drainage in the same way as silt, and the smallest particle size should be ¼ inch (0.64 cm). It also helps to test your trench’s drainage with a hose before you proceed.
Benefits of Frank Lloyd Wright Rubble Trench Foundation
We might have touched on these, but here’s a detailed explanation of the advantages of building with the Frank Lloyd Wright rubble trench foundation technique:
- It’s cheaper than conventional concrete footing. Frank Lloyd’s foundation construction technique requires fewer materials than traditional concrete footing, which helps keep material cost low. And since there’s no footer forming, too much digging, and backfill isn’t required, it’s also cheaper in terms of the labor requirements.
- Minimal impact on the construction site. That’s because you only need to dig as per the outline of your building.
- Lower carbon footprint. This is because a rubble trench footer uses up to 80% less concrete than a conventional footer. Since cement production is responsible for up to 8% of the world’s CO₂ emissions, reducing the amount of concrete used in construction translates to lower greenhouse gas emissions, which is great for the environment.
- It allows the recycling of construction materials. The rubble fill may contain recycled concrete crushed to size. Since such concrete would barely have any other use in construction, it would likely end up in dumpsites, which causes pollution.
Potential Drawbacks of Frank Lloyd Wright Rubble Trench Foundation
Some of the potential challenges you may face with this foundation construction technique pertain:
- The soil type. Soils with not-so-great bearing capacity may call for a very wide trench to achieve enough bearing area. In extreme cases, a different footing alternative may be required.
- Building permits. Most jurisdictions don’t specifically recognize rubble trench foundations in their building codes. As such, permits are issued on a case-by-case basis, meaning you may need to negotiate with permitting officials. The good news is, they’ll likely approve your project if you’re armed with drawings from a licensed engineer.
Using Large Roof Overhangs
Large roof overhangs are a critical requirement for a cordwood house because the log ends in the walls are usually prone to moisture damage. Splashback from snow and rain is often the biggest issue, causing discoloration and degradation (AKA mold, mildew, and rot) in the cordwood. If left unchecked, moisture can also compromise the longevity of a cordwood building.
As a general rule, the roof overhangs should be at least 16 inches (40.64cm) to control moisture damage. To further protect the wood, you can set the exterior log ends flush with the mortar when building or even go the extra mile of coating them with linseed oil.
Choosing the Right Type of Wood
While different people have varying preferences, some of the most commonly used wood types include Eastern white pine, Juniper, Douglas fir, Spruce pine, new growth of Bald cypress, Pacific yew, and Western larch.
Choosing the right type of wood when building with cordwood construction is important because this material makes up about half of the walls. When making this choice, there are several factors to consider.
Let’s discuss them below.
Stability
By stability, we mean how much the wood expands and shrinks over time. As a general rule, wood that expands a lot will shrink a lot, too, and the reverse is also true. Typically, dense, heavy hardwoods shrink and expand more than their light soft, airy counterparts.
To differentiate between the two wood types, take a look at the annual growth rings. In hardwoods, they’re typically small. Ideally, you’ll want to use wood that doesn’t shrink and expand too much because this can cause cosmetic issues.
Insulation
Insulation (also denoted as R-value) is another area where lighter, airier softwoods outperform their heavy, dense, hard counterparts. The insulative characteristics of the latter wood type are similar to those of stone: It has great thermal mass but a poor R-value (AKA transfers heat rapidly).
Dimensional Consistency
This simply refers to how well the log end of a particular wood type maintains its shape and size from one end to the other. You don’t want your wood to have severe taper or twists because if most of your log ends do, the wall will be very hard to build.
Additionally, a wall made of irregular long-ends will be unstable because there’s usually little “paste bond” and zero chemical bond between the mortar and the wood in cordwood construction. All in all, you’ll want to avoid log ends harvested from severely twisted/tapered or “bushy” tree species.
Aroma
Most DIY builders don’t consider this, but some wood types such as the Siberian elm do stink. You’ll want to avoid these. On the other end of the spectrum, there are aromatic wood types like cedar. But while their smell might be appealing in small doses, it can be irritating when it’s too strong. Seemingly, odorless wood is the safest bet, but this is entirely a personal choice.
Control Rotting
Rotting of logs in a cordwood house is rarely related to the type of wood. Rather, it has more to do with adhering to the basic principles of building with cordwood.
To control rotting in a cordwood house, observe the following rules:
- Avoid building with insect-infested or punky (AKA rotting) wood.
- Remove the bark beforehand.
- Ensure that the first course of your stack wood masonry is well above the ground (2-4 inches or 5.1-10.2 cm for wet regions and 8 to 12 inches or 20.3 to 30.5 cm in dry areas).
- Ensure that the log ends in your stack wood masonry don’t rest against each other because this traps moisture, which can cause a host of problems.
- Use large roof overhangs, as discussed earlier.
Minding the Building Code
Different jurisdictions have varying building requirements, so the best way to ensure that your DIY cordwood construction project conforms to the law would be to consult with a structural engineer who is familiar with the building code in your area.
This is particularly important when building in a seismic zone because the laws are usually different from a non-seismic region. For instance, in the latter, the walls can be load-bearing, unlike in a seismic zone.
Final Thoughts
Kudos for making it to the end of this long read. But before we wind things up, understand that taking the DIY route with cordwood construction may take some used for a novice builder.
As such, you might be better off trying out a small project before taking on a sizable one. This way, if you don’t like the end result or find the project too tiring and time-consuming, you won’t have wasted much time and resources. And if you do end up wanting to build a larger cordwood house, the small project will have given you invaluable experience, which you can then apply to the larger project and minimize costly mistakes.
All the best!
Sources
- ThisNZLife: A Beginner’s Guide to Building a Cordwood Masonry Home
- RealWorldSurvivor: Build Your Own Budget-Friendly Cordwood Cottage
- CordWoodMasonry: Small Cordwood Buildings
- Homeklondike: Cordwood Houses: Interesting Facts and Tips
- Chatham House: Making Concrete Change: Innovation in Low-carbon Cement and Concrete
- Build Naturally Blogspot: What is a Rubble Trench Foundation?
- CordWoodConstruction: Splashback is a no-no for Cordwood walls: How to fix
- GreenHomeBuilding: Structural Considerations of Cordwood
Share this Post
Giovanni Valle is a licensed architect and LEED-accredited professional and is certified by the National Council of Architectural Registration Boards (NCARB). He is the author and managing editor of various digital publications, including BuilderSpace, Your Own Architect, and Interiors Place.