Affiliate Disclaimer: Some of the links below are affiliate links. As an Amazon Associate, I earn from qualifying purchases.
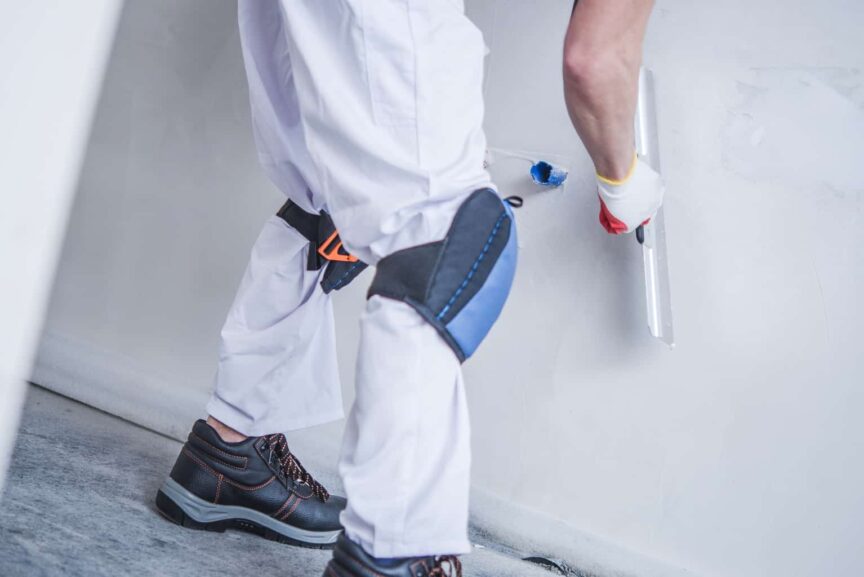
Applying drywall mud is a skill that takes time and practice to develop. Sometimes, as a result of improper application or external factors that are no fault of your own, your drywall mud may begin to bubble and swell. Bubbles in your drywall mud are not only unsightly, but they will also diminish the quality of your finished product, so how do you fix air bubbles in drywall mud?
To fix air bubbles in drywall mud, you will need to apply three coats of drywall mud. The first coat should be applied and immediately skimmed very firm and tightly to create a base. The second coat will fill and hide your joint. The third coat will ensure no bubbles can rise to the surface.
This article will go over the following:
- The most common causes of air bubble formation in your drywall mud.
- Solutions for fixing air bubbles in your drywall mud to create the desired result every time.
- Provide a few basic compound application tips.
- Suggestions for where you can purchase quality mud that will get the job done right.
What Causes Air Bubbles To Form in Drywall Mud?
Before we discuss how to fix drywall mud bubbles that have already taken form, we need to talk about some of the most common reasons why this bubbling has occurred in the first place. Understanding what causes mud bubbles to form in drywall mud will allow you to prevent their occurrence in the future, which can save you a lot of time, energy, and frustration.
Every wall is different and presents its own unique challenges. Some drywall slabs have no tendency to form bubbles in your mud, while others need meticulous attention to your technique to avoid bubbling.
Drywalling is an art form rather than something that can be learned from a book, as those who have spent decades perfecting the craft are the most qualified to give advice. Although drywall veterans seem to have different methods and approaches, this article aims to provide an objective solution for fixing drywall mud bubbles that will work in all situations, regardless of skill level or experience.
Note that we are using the terms mud and joint compound interchangeably throughout this article.
You Didn’t Mix Your Joint Compound Properly
One of the biggest mistakes that amateur drywallers make is that they do not mix their mud thoroughly before applying it.
There are two types of drywall mud: premixed and dry. Premixed comes ready to use, whereas dry compound requires the user to add water and adjust the thickness and consistency.
For the sake of simplicity and convenience, premixed drywall mud is a very popular choice, but it often comes a little too thick. Overly thick joint compounds can lead to the formation of bubbles, which often go unnoticed until it is too late because the compound’s thickness makes it so they do not immediately appear on the surface and only become apparent later.
If you find that your premixed joint compound is too thick and not spreading nicely, do not hesitate to add some water to it and thin it out a bit.
You’re Using Old Drywall Mud
Generally speaking, you should use drywall mud relatively soon after purchasing it. Storing drywall mud for extended periods may cause it to harden, soften, lose its adherence, and alter its viscosity.
Old drywall mud may no longer possess the integrity it once had, and using it can result in a range of different problems, including air bubbles. Do not use old and compromised drywall mud. Make sure it is new, or like new, before using.
Compounding Over Painted Walls
While you usually apply mud to new and unpainted drywall, there are situations where you need to use joint compound for patching over holes or cracks in painted drywall. Applying mud to painted walls greatly increases the chance that you will encounter bubbling.
Unlike unpainted drywall, which is papery and porous, painted drywall is sealed and cannot absorb the compound and the air bubbles therein. Therefore, all of the air in your mud is pushed outward and appears on the surface.
Not Enough Compound Was Left Underneath Your Tape
Another frequent cause of drywall mud bubbling, specifically under the tape, is that beginners press too much mud out from under their tape with their knife, which does not only cause the mud to bubble but will also leave your tape with a poor and unreliable adhesion that is bound to lift and separate sooner or later.
While it is right to smooth your tape down and press out the excess mud, you need to leave enough so that it can absorb the air bubbles and form a strong seal.
Drywall taping is a fairly straightforward process, but many things can go wrong, which is why it is important to be consistent and learn from every problem that you encounter. For an easy-to-follow, six-step guide on how to properly apply drywall tape so that you may get it right the first time, see this article by Home Depot.
How To Fix Air Bubbles in Drywall Mud
The best way to fix air bubbles in drywall mud is by adjusting how many coats you apply to the wall and how you apply them.
If you apply compound to a wall and notice that bubbles are appearing on the surface moments later, you will need a third coat. It’s important to note that you will be unable to fix this problem with no less than three coats of mud.
Follow those steps for each coat in order to fix bubbles in drywall mud:
- Apply the first coat of mud, then skim it very tightly with your knife at an angle of 45 degrees. The first layer aims to form a base and fill whatever joints, cracks, or holes. Immediately after applying this first coat, scrape it very tightly until little remains.
- Apply the second coat. The purpose of this second coat is to fill in and cover your joints, mask and make them invisible, and to give your wall a nice smooth and professional look.
- Skim over the surface again with your knife, but with much less pressure. Let this second layer set for some time and watch to ensure that the bubbles do not reappear and resurface.
- Apply your final coat as normal. By the third coat, you will have built up enough of an undercoated base that bubbles will be unable to form, even when compounding over painted walls.
While this process can seem time-consuming, it will be the only way to ensure that there are no air bubbles in your finished product in certain instances.
Dish Soap Hack
An old drywallers trick for making your mud less prone to bubbling is to take a little bit of liquid dish soap in a cup, add a bit of water to it, and then mix it into your compound. Your mud will be a little bit stickier, which can help mitigate a lot of the air bubbles that are always present to some degree in any joint compound.
Where To Purchase Quality Joint Compound
Those in the drywalling game know the ins and outs, and will likely have certain products and compounds they prefer to use.
Every type of drywall mud is slightly different, and whichever one you ultimately decide to use is up to you, but some brands are objectively better than others. You will want to go with a high-quality mud mixture to avoid complications and further repair jobs down the line.
The most reliable and affordable drywall product for general use is US GYPSUM All-Purpose Joint Compound, which has a broad range of applications and has amassed a very good reputation among industry professionals. It is ideal for anyone from beginners to the most advanced level drywallers and is, therefore, our recommendation for the go-to drywall mud product.
It is also necessary to use a proper compound mixer to avoid problems such as those discussed in the ‘What Causes Air Bubbles to Form?’ section of this article.
If you require a drywall mud mixer, consider the Poweka Electric Mortar Mixer, which is an easy-to-use and affordable mixing device that will allow you to stir your compound with ease.
A well-mixed mud is the first step toward a job well done, and it will keep your walls looking great for many years to come.
Conclusion
This article was written to provide a solution to anyone looking to fix the problem of air bubble appearance in their drywall mud. Drywall mud bubbling is most common when compounding over painted surfaces as opposed to fresh ones.
The only sure way to fix mud bubbles in drywall compounds is to apply three coats. The first coat is simply a base and will be skimmed very tightly, so little remains. The second coat is what will fill in the joints and hide them. The third coat will give the wall a uniform and expert look.
Sources
- Trusted Pros: Air Bubbles in Drywall Compound
- Popcorn Removal: How to Prevent Bubbles in Drywall Mud
- YouTube: Vancouver Carpenter – Bubbles in Drywall Mud
- Home Depot: How to Tape Drywall
Share this Post
Giovanni Valle is a licensed architect and LEED-accredited professional and is certified by the National Council of Architectural Registration Boards (NCARB). He is the author and managing editor of various digital publications, including BuilderSpace, Your Own Architect, and Interiors Place.