Caulking is a simple solution to stopping or preventing leaks and creating seals for construction and home restoration projects. The type of seal required and its characteristics will largely determine the caulking you use. Not only does the material of the caulk vary, but the consistency for more extensive and difficult sealing requirements.
Compared to traditional caulk, sand can be added for strength to create tighter holds on larger gaps and joints. If you are working with joints larger than 1/8 inch or using caulk against sanded grout, use sanded caulk. A simple unsanded caulk will work well for smaller projects that will not require added bulk.
The caulk you use will primarily depend on the specific dimensions and circumstances of the project you are working on. Examining the joint or gap beforehand is necessary to pick the right caulk and ensure you have enough of it. Let’s dive into sanded and unsanded caulk and how to choose which one is best for areas that need to be sealed.
When to Use Unsanded vs. Sanded Caulk
The general rule is to stick with unsanded caulk unless you need something much stronger and more structured for larger joints. Unsanded caulk allows you to get most jobs done successfully, and its smooth appearance is preferable in areas where a seam or seal is visible.
Both unsanded and sanded caulk are quality products that can have some overlap in their uses. Use unsanded for the tight joints, especially those that meet in visible areas, so the seal does not draw attention to itself. While the primary goal is ensuring nothing seeps into or around the home, leaving yourself with a finished and professional look can also be achieved.
We’ll talk about sanded and unsanded caulk in more detail below. Before getting into that, let’s discuss what types of caulks are out there and what projects they are best for.
Choosing The Right Caulk for a Project
Caulking is primarily used for filling gaps to prevent issues with water, air, or bugs entering a home or structure. It can also be used to improve cosmetic appearance in gaps that may not pose any risk to the building.
Caulks are available in multiple materials and should be considered before deciding to use sanded or unsanded:
- Latex: If you want to create seals for outdoor jobs, latex is a quality choice because it isn’t impacted by changes in weather or temperature that could contract or expand if using another type of caulk (Source: Dummies).
- Silicone: This is the best option for creating seals and filling joints in areas that need to prevent water from seeping through. Silicones are often used in showers, baths, and sink applications. You can also use silicones in higher temperatures without the caulk breaking down and is best for long-lasting results.
- Urethane: I recommend using this type of caulking, especially for cosmetic applications, because it holds paint well. Polyurethane is slightly different from regular urethane, creating a harder seal. This type of caulk is very popular and is often chosen for heavy-duty jobs. Flexibility is also a benefit in preventing cracks and broken seals (Source: Adhesives).
- Acrylic sealants: Sealants act similarly to caulk, and acrylic ones are used for applications that need to be painted and are a great solution for cosmetic additions and changes.
Sanded caulk is available with these different types of caulks, depending on your preferences for the initial materials. These choices can help you determine what you will need for your application and whether or not sanding is needed. For caulks that cannot be painted, I recommend choosing a colored caulk that closely matches the area you will be applying it to.
When to Use Sanded Caulk
After deciding on the material for the caulk, you may need to use sanded caulk for greater strength and durability. For water blocking, I recommend silicone caulks and latex for outdoor applications. Polyurethane is a great solution if painting the area is essential, especially with more prominent and visible joints.
What Is Sanded Caulk?
Sanded caulk is the regular caulk you may be used to using but with sand added in for texture. Sand adds extra strength and bulk to the caulk, which is not always very thick in regular applications. Adding a large amount of standard caulk will not be beneficial to securely hold larger joints. Using a smaller amount of stronger sanded caulk can offer a better solution.
It is often marketed as tile caulk because it can be used in conjunction with grout and is able to fill in areas that need touching up. Bathrooms and areas with tile are common locations for those who use sanded caulk.
Reasons For Using Sanded Caulk
Tackling larger jobs may require sanded caulk for its greater strength and stability in holding deep openings.
There are two key situations when sanded caulk may work best:
- Significant gaps and joints: When joints and holes that need to be filled are too large, standard caulk may not be strong enough to support and reinforce the area. Using unsanded caulk for these larger joints may not be as effective and will not be held as securely when there is much of it in one deeper joint.
- Applying caulking next to or to support grout: Grout is also a sanded mixture that is used to create permanent sealing, especially around areas with lots of water contact (Source: Home Depot). Adding another material with a similar texture can help to further support the area. This is often included when working with tiles and securing areas with glass.
Consider the size of a gap or joint before deciding what type of caulk to use. If the gap is more prominent than 1/8 inch, you should use a sanded caulk (Source: SF Gate). When gaps are more extensive, they need more sealing material for security. Sanded caulk’s added texture makes it much more robust and will fill the more significant gaps more effectively than unsanded caulk.
While grout is used to fill areas between tiles and other connected pieces of material, caulk is used explicitly for sealing these areas. Sanded caulk acts as a great cross product that will both fill and seal the areas needing securing. Caulk may not last as long as grout in many applications, but it is excellent for minor adjustments and preventing damage from moisture (Source: Tile Council of North America).
Beyond the specific scenarios to use caulk, you may benefit from sanded caulk for:
- Durability: With added sand, the texturing adds better structure and beefs up the composition of the caulk. This will help to prevent it from breaking down prematurely and needing to be reapplied as you would with regular caulk to a larger area.
- Versatility: Using sanded caulk for various applications makes filling gaps much more manageable and gives you confidence that holes and joints will hold. It can also adhere to different types of materials, unlike grouts and some other fillers that need hollowed spaces to enter.
- Consistency: Because sand is in the caulk, it is less susceptible to breaks and damage with contact. Sanded caulk is reliable and smooth when applied. You can also work with it for around 30 minutes before it starts to tack or adhere to itself during the drying process (Source: Custom Building Products).
When working with larger spaces to fill or with required sealings in tile and sanded grout applications, sanded caulk is the preferred choice. You may also find that stronger unsanded caulks can accomplish similar sealing goals.
When to Use Unsanded Caulk
Most home projects use unsanded caulk (also referred to as standard caulk), especially for more precise and detailed work. Sanded caulk has very specific applications, while unsanded caulk can be used across a greater variety of jobs. It is commonly applied to prevent air and water issues and to enhance cosmetic appearance.
The varieties of caulk mentioned earlier in the article are most commonly found in unsanded forms and can be applied to many indoor and outdoor projects for needed sealing.
You should consider using unsanded caulk in the following applications:
- Small gaps and joints: If your joint is smaller than the 1/8-inch standard used for sanded caulk, you should use regular (unsanded) caulk. This caulking can be applied more precisely as it does not have the added thickness or texture of the sand. Unsanded caulk can enter tighter areas, especially those that need simple seals rather than durable reinforcement (Source: Forestry Products Lab).
- Carpentry errors: If you notice minor errors in how joints or areas in the building meet, adding caulk can significantly improve the area’s appearance. Especially when painted to match, these errors visibly disappear.
- Shifts in a building: As a home or building ages, there are likely to be slight movements that occur in the structure. These shifts are known as settling, and they are caused by downward gravity upon the foundation over time (Source: HowStuffWorks). This can make joints uneven, often most noticeably at the corner of molding and window trims. Caulk not only helps to seal these areas where air could be exposed but also hides the newly forming gaps.
- Aesthetic appearance: Adding caulk to trims and moldings where the board meets the wall adds a finished look to a home. Particularly if you will paint these areas, the transition from board to wall may be too stark. Adding the caulk at the seams will make this contrast smoother and more sophisticated. Sealing also helps to protect and extend the life of the molding by not allowing dirt and debris to get trapped behind.
Why Is It Important to Caulk?
From a longevity perspective, around the home, caulk should be applied to areas that risk damage or problems related to airflow, water exposure, and bugs.
- Airflow: If gaps between window trims or moldings around doorways exist, you could be allowing air to pass in and out of the home and have difficulty regulating temperature. In cold months, you could be wasting heat.
- Water: Preventing water from entering the home is also essential to minimize damage and potential mildew or rot. Keeping tight seals with grout in small and narrow joints is especially important because these areas often go unnoticed but could lead to more significant problems over time. The same principles are applied in the desire to keep bugs out (Source: Lowe’s).
- Pests: You not only have to worry about external water and damage but also consider internal gaps and cracks as well. Using caulk in bathrooms, showers, sinks, and toilets is essential to keep water from damaging your bathroom and kitchen areas. This can prevent leaks and damage to other surfaces that are often in contact with water.
Applying Sanded and Unsanded Caulk Successfully
The application of caulk is very similar for both sanded and unsanded caulk. The goal is to appropriately fill joints and gaps while doing so neatly. Applying the caulk first starts with choosing the type and then preparing the area for adhesion.
These are the steps you should follow to properly apply caulk:
- Get the proper materials: In addition to the caulk, you will need:
- Caulk gun
- Some form of razor blade or sharp edge
- Painter’s tape
- Rags and rubbing alcohol
The caulking gun is not required, but it helps to stabilize the line of application and does the work for you in squeezing consistently. A razor blade will help to remove and clean up stray caulk. The painter’s tape should be applied to the surfaces that meet the joint to avoid messy lines. Having rags and rubbing alcohol for fast clean-up.
- Prepare the area:
- Remove old caulk. This can be done most easily with the razor blade to precisely cut it out.
- Clean the area. After removal, you should use a vacuum to remove any leftover debris. The rag and rubbing alcohol can be used here to wipe down the surface for a clean workspace.
- Tape the area. Add your painter’s tape in a straight line along the area you will caulk, and make sure you press firmly on the tape closest to the joint. This will prevent any caulk from getting under the tape. This little hack will help you to keep the caulk in a perfectly straight line with clean edges (Source: Helpful DIY).
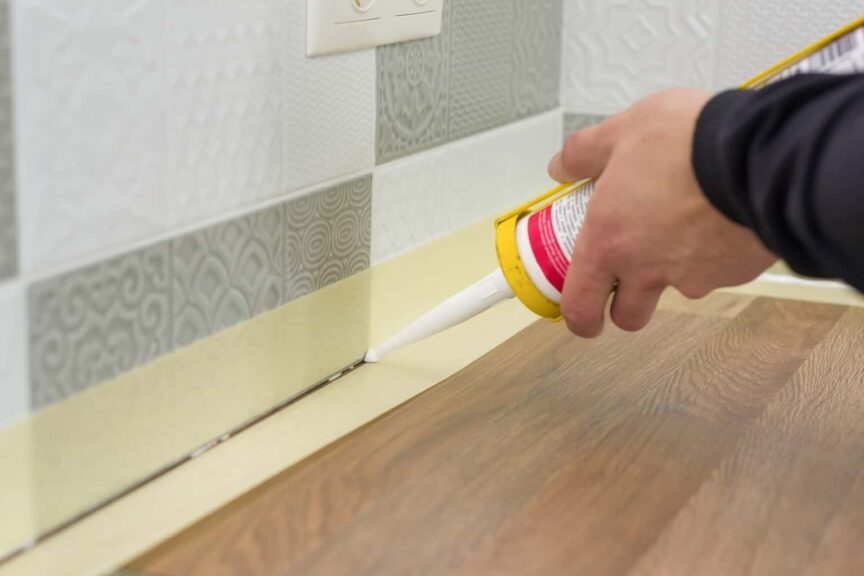
- Open caulking gun: The caulk tube must first be opened by cutting off the end tip as close to a 45-degree angle as possible. This will help to keep the caulk consistently flowing in a straight line. The size of the cut will depend on the size of your joint, but it should depend on the size of the joint (Source: Make Build Modify). You will then have to break the seal inside with a wire or nail.
- Add caulk: Also, position your gun at a 45-degree angle into the joint and ensure enough force is applied to fill the joint completely. The nozzle tip should touch or be pressed firmly against the line to adequately fill the joint. Ideally, you will have filled the joint and may have some excess on the surface for smoothing.
- Smooth the caulk: Once you have applied the caulk with the gun, you should press gently against the caulk with your finger. This will ensure that the joint has been filled and make the caulking less noticeable at the surface.
Not only are we trying to create an effective seal, but we also want to keep the lines clean. Wet your fingers with a solvent (thinning agent) depending on the caulk you use. Instructions for the individual caulk should provide some guidance on the thinning agent. Have a rag handy to wipe away excess from your hands.
- Remove the tape: If you used the tape method, it should be removed after smoothing to keep the lines clean but prevent drying. You will want to remove the tape away from the joint to prevent the caulk from lifting out the area you just applied.
- Allow the caulk to dry: Drying times will vary depending on the caulk used, but most will begin to set in around 30 minutes to an hour. If you plan to paint the caulk, you should wait longer for it to be fully set. Look at the manufacturer’s recommendations for dry time. Acrylics dry more quickly, while polyurethanes take longer, making painting applications different between caulk types (Source: Waterproof Caulking and Restoration).
Conclusion
While choosing the type of caulk is essential for specific jobs, understanding the application steps will ensure the execution is clean and the job is well done. More time and detail that is spent on keeping lines clean and smooth will result in more complete and quality seals but also leave you with professional-looking trim and molding work.
Share this Post
Giovanni Valle is a licensed architect and LEED-accredited professional and is certified by the National Council of Architectural Registration Boards (NCARB). He is the author and managing editor of various digital publications, including BuilderSpace, Your Own Architect, and Interiors Place.