Affiliate Disclaimer: Some of the links below are affiliate links. As an Amazon Associate, I earn from qualifying purchases.
A wooden privacy fence is a wonderful way to keep your property private without sacrificing the beauty of nature. There are many options when it comes to building a wooden privacy fence and one important decision you will need to make is whether or not your fence should touch the ground.
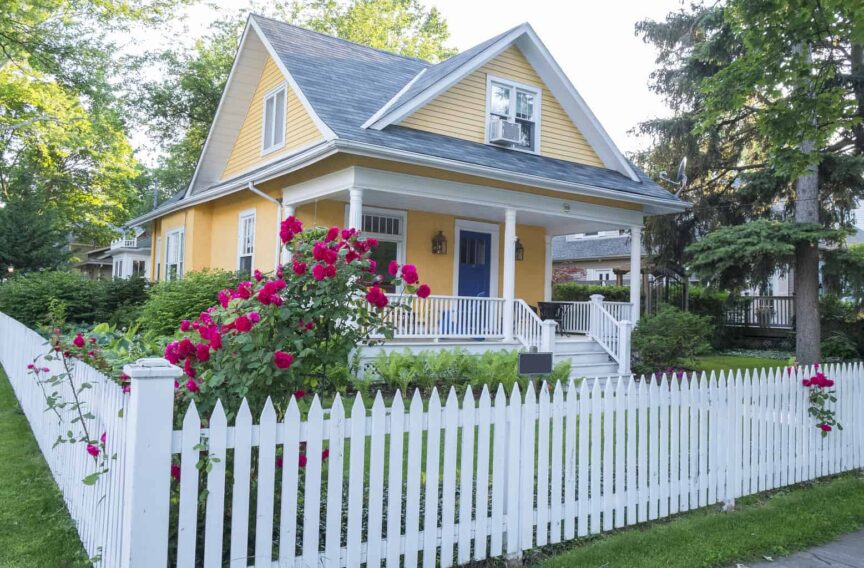
Wooden privacy fences shouldn’t touch the ground. They must be 2in (5.08cm) or higher off the ground so water can drain from the property. If the fence is too low or touching the ground, moisture can collect and cause wood to rot, and it makes regular yard maintenance difficult.
This article will further discuss whether a wooden privacy fence should touch the ground, why, and other things to consider about wooden privacy fences.
Should a Wooden Privacy Fence Touch the Ground?
A wooden privacy fence should never touch the ground, with the sole exception of the fence posts necessary to secure the fence. This is because wooden pickets touching the ground absorb moisture, causing the pickets to expand and opening the door for mildew and other fungi to cause the wood to rot.
To keep your fence looking nice for a long time, you should keep a 2in (5.08cm) or more gap between your pickets and the ground. This is to prevent moisture absorption and keep your fence from getting damaged by swelling and rot. Leaving the gap allows water to drain from your yard efficiently.
Leaving this gap also makes cleaning the base of the fence easier, as debris and vegetation won’t collect at the fence’s boundaries.
What if I Don’t Want a Gap in My Fence?
Many homeowners find the seemingly large gap under a fence unsightly, or perhaps they don’t want small critters like chipmunks and squirrels to come through the opening. Others have pets of their own they don’t want to escape. Thankfully, there are multiple options for hiding the hole in your fence.
Rot Boards
Rot boards are horizontal boards installed on the bottom part of your pickets. They cover the bottom gap of the fence, protecting the pickets from moisture, and give the fence a finished look. Rot boards can be trimmed and placed atop fences and along the bottom to give a symmetrical appearance.
Shrubbery
Planting small, dense shrubs in front of the gap can be used to effectively ‘hide’ it from view. This can be done on both sides, assuming there’s enough room. This doesn’t stop small animals from going to and fro, but it works as an aesthetic solution when you’re only concerned about the appearance of the fence.
Fencing
Critter fence and chicken wire fence can also be used to fill in the gap of a fence if animals coming in/out of your property is a concern. Of course, this doesn’t look very nice, but you could use the previous suggestion and plant shrubs in front of the area with your desired anti-critter fence underneath.
How To Install Fence Posts
Fence posts are the backbone of your fence, and any wooden fence is only as secure as its posts. Surprisingly, there’s a bit more to installing posts than just digging a hole and sticking the post in. The good news is that it’s still not very complicated to accomplish.
Here are the things that you’ll need:
- A posthole digger or auger
- Treated wood fence posts
- Fast-setting concrete (Quikrete Concrete Mix is perfect)
- Gravel (optional, but good for flexibility and strength)
- Eye protection
- Gloves
- Bucket
- Level
- An assistant
To install fence posts, follow these steps:
- Dig the holes with your posthole digger or auger. Depth should be between a third to half of the height of your posts as a rule of thumb, but check local building regulations to make sure that’s deep enough.
- Make sure to leave room for gravel and concrete! The diameter of the holes should be about 3 times bigger than the post; for example, 4in (10.16cm) posts need 12in (30.48cm) holes. Holes should be 6 to 8ft (1.83 to 2.44m) apart, and corner posts should be installed first as guides.
- Add about 6in (15.24cm) of gravel to the hole. This creates a solid foundation for your posts and keeps them from touching soil, which can cause and accelerate wood deterioration. Gravel also helps any water that gets in the hole to drain efficiently.
- Tamp down the gravel – the posts work great for this. All you have to do is hit the gravel firmly a few times with the post.
- Have your assistant hold the post in the hole while you pour dry concrete mix around it in the hole. The post should stay centered and touch the gravel on the bottom. Stop pouring a few inches below ground level, and always use eye and hand protection when handling concrete mix!
- Pour water into the hole using your concrete mix’s instructions. Generally, a gallon (3.79L) per 50lb (22.68kg) bag is okay. Don’t dump the water in; instead, slowly pour and allow the water to saturate the concrete mix.
- Level the post immediately after filling the hole. It should be perfectly level or ‘plumb.’
- Tamp down the concrete with a long stick or another post. The concrete should set in about an hour, and cure in 4 hours or so. Posts will need to be braced until the concrete sets to keep them in position.
Sound like a lot? Don’t fret, because this isn’t necessary for every single fence post. Good news for you, too – concrete is expensive! Only posts supporting the weight of a gate or otherwise being focal points need concrete. Otherwise, you can simply dig a hole in the soil, place the post in, and tamp soil around the post.
How To Maintain Even Distance Between Pickets and the Ground
It can be tricky to maintain a consistent distance between your pickets and the ground, especially if you have lots of slopes on your property. If done improperly, it can be a messy and uneven fence that isn’t totally secure. Such fences can easily fall in heavy storms and because of rough handling. However, there are some methods of making it more manageable.
Using pre assembled fence panels takes most of the work out of the task because they’re already attached to the backer rails, which connect together using fasteners. The average homeowner should not have much of a problem building their own fence with the help of a friend or family member – plus proper protection!
Ensure that the top rails of the panels are no more than 7 to 8in (17.78 to 20.32cm) from the top of the fence and that the bottom rail is the same distance from the ground’s grade – then the middle rail should be more or less evenly placed between those two rails.
Keep in mind that the bottom rail’s distance from the ground includes the 2in (5.08cm) gap, so it would look slightly off. It isn’t, so don’t worry.
If your panels are in good order, the next step is to put the fence together!
To install pre-assembled fence panels, follow these steps:
- Dig your post holes according to the previous section’s instructions and set a mason’s line to ensure the holes are even and straight.
- Set the fence panel by sliding its bottom rails into the mortises of the fence post. You’ll need to brace the far end of the panel with a wedge or block to ensure even installation and adjust until it’s even. If your posts don’t have mortises, you’ll need to prop the panel up so that the top rails are level and screw the panel into the post by the bottom rail.
- ‘Racking’ is the process of slightly adjusting the rails to match the slope of the ground while keeping the pickets and posts perfectly straight. Lift the whole panel up and carefully set the end of the bottom rail onto the ground or a block/wooden wedge. Turn the entire panel around and drop the top rail in the same place you put the bottom rail. Repeat this step until the panel ‘gives’ or very slightly bends.
- With your panel in place, attach the other end of the panel to the next fence post. For mortised posts, slide the rails into the mortise, and you will need to screw panels in if the posts lack mortises.
To build a gate, follow the steps below:
- Use the same steps above to set the first gate post in the ground, then measure the gate width plus a couple of inches. That will be the location of your second gate post.
- Fill with concrete and tamp until set.
- Attach the next fence panel to the other side of the gate posts to ensure stability.
- Place the gate between the fence posts and level it. The gate pickets should be evenly placed with the next panel’s pickets for an even appearance.
- Screw the gate into one post with hinges.
Final Thoughts
While building a wooden privacy fence can be challenging, keeping a gap of at least 2in (5.08cm) between pickets and the ground will greatly increase the chances that your fence will last and look great for many years to come.
Sources
- This Old House: How To Install A Picket Fence
- OUTDOOR ESSENTIALS: How far off the ground should a wood fence be?
- AskingLot: How do you space a picket on a fence?
Share this Post
Giovanni Valle is a licensed architect and LEED-accredited professional and is certified by the National Council of Architectural Registration Boards (NCARB). He is the author and managing editor of various digital publications, including BuilderSpace, Your Own Architect, and Interiors Place.