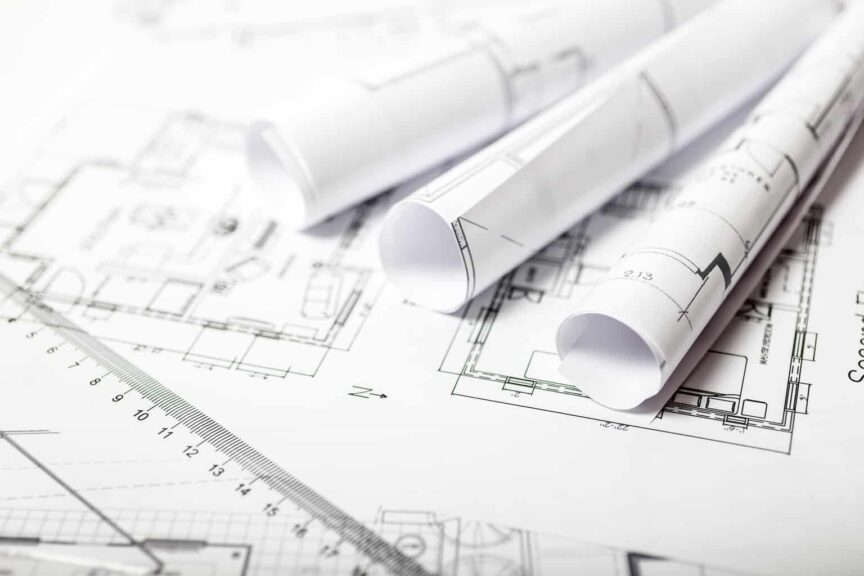
When it comes to the construction of a building, most, if not all, jurisdictions require a building permit before the start of construction. Whether it be a local planning board for your community, a state requirement, or requirements by the federal government if the project is big enough, it’s important that you meet all the stipulations to obtain the permit.
In most cases, plans need to be stamped or sealed by an architect, engineer, or other qualified professional in order to be approved. For this reason, be sure to check with your local building department to see if that applies to your situation. With that said, if your project is small and does not require a professional seal or stamp, here is a guide to help you along in the process.
How to draw plans for a building permit:
- Begin With a Conceptual Bubble Diagram
- Find a good starting point and a proper scale.
- Practice working with your scale.
- Draw an overhead view of your planned construction.
- Add relevant information to your building plans.
- Add or make a note of other details on the property.
- Be sure to label every part of your project.
- Add more information depending on the type of project.
Building new properties can be incredibly complex. Following each step in drawing plans for a permit is incredibly important to ensure your project is a success. Let’s take a deeper look at the process to make sure everything goes off without a hitch.
1. Begin With a Conceptual Bubble Diagram
One of the first steps in designing a plan is figuring out how different spaces are interconnected with one another. In the same way a writer creates an outline, before drawing a plan you can create what is known as a “bubble diagram“. This diagram is a list of rooms (with an oval or “bubble” around them) laid out visually in relation to one another.
Lines are then added to show how each “bubble” or room connects with another. By doing this you are essentially creating a simple diagram that shows the layout you intend to detail in the plan. Remember that you don’t have to get it perfect the first time! So get that tracing paper ready and come up with a few options until you are happy with the solution.
2. Find a Good Starting Point and a Proper Scale
The next step is to draw the boundary outlines of the building or room you are designing and begin to fill in the spaces so that they effectively match what you’ve laid out in the bubble diagram. While there is no set rule, when drawing a building plan, starting from a corner or an edge rather than in the middle is often a good approach.
Additionally, when drawing plans for construction, using the same, consistent scale is often easiest. If you’re building a twenty-five by twenty-five shed, using a scale like one foot per inch may be doable. But if you’re building a larger building, this isn’t a good scale to use. Typically you want to stick to 1/4″ or 1/8″ scale depending on the size of the building.
Be sure to determine a reasonable scale and stick with it throughout the planning process.
3. Practice Working With Your Scale
Once you’ve decided what scale you’ll be working with, it’s essential that you practice using that scale. Just because you have an idea in your mind doesn’t always mean that it’ll work. Keep in mind that what you outlined in your bubble diagram may shift as the realities of scale start to affect the layout.
Also, you may find that the scale you initially selected doesn’t work. That’s okay. Plenty of architects, building planners, and others have started working with a scale but then changed their minds halfway through the project.
Practice makes perfect, especially when it comes to building planning. This also means that you should be prepared to redraw your plans and have a number of drafts.
If you make a mistake with your scale or decide to change it part of the way through, restarting your plan is best to make sure it’s as accurate as possible.
4. Draw an Overhead View of Your Planned Construction
Often, people’s first interaction with the concept of varying points of view comes in a basic science or art class. You don’t think about it regularly, but everything we experience has different points of view. Think about the room you’re sitting in right now.
From where you’re sitting, the room looks a certain way, but if you were standing somewhere else in the room or even were looking down on the room, it would look very different.
When it comes to building plans, the same is true. Most building plans are drawn from an overhead view, and this is what I recommend you start with, as it’s the easiest view to draw and envision.
5. Add Relevant Information to Your Building Plans
Sometimes, people get so enthralled in their project plans that they forget that other people need to understand them. While you may be familiar with all of the elements shown on your plan, others are not.
Assume that the person viewing your plans has no background knowledge of what is illustrated. This means that you may need to add other information to your project so people can also understand your plans.
Be sure to add things such as location markers, directions (i.e north, south, east, and west), and other property markings such as a stream, hill, or other relevant information for builders.
6. Add or Make a Note of Other Details on the Property
In addition to your floor plan showing the layout of interior spaces, you may also need to include a site plan showing the building in relation to the property lines and other features of the property.
If this is the case, remember that the plan’s main objective is to identify what is on the site in relation to the building. Take inventory of everything on the property, up to the property lines, and identify them on the plan.
It’s important that you make a note of other objects or obstacles that may affect your building plans. Be sure to add things such as fences, swimming pools, driveways, other structures, or any other aspects of the property that you’d want to see on a site plan.
7. Be Sure To Label Every Part of Your Project
Making sure aspects of your building plans are labeled may be the most crucial step in the entire process. Not only is it essential so that you, the designer, don’t get confused, but it’s also to ensure that the person approving your plan and the actual builders know what they’re doing.
A bathroom, bedroom, and kitchen can look very similar without any labels. While you may assume that showing fixtures is enough, that may not be the case. You may be able to tell the rooms apart but others may not, so making everything incredibly clear to all parties involved is critical.
If you will be adding details or wall sections to the set of drawings, be sure to identify them on the plan so that they are easy to reference. Remember that the floor plan is usually the initial point of reference for anyone viewing your set of drawings.
8. Add More Information Depending on the Type of Project
Different jurisdictions require different views and information depending on the type of project and permit you’re trying to fulfill.
Most jurisdictions include a checklist of everything you may need to get approved, so making sure that you fulfill these requirements is essential. Including additional pages with different views is a great idea even if it isn’t required.
Additional information may be necessary, such as an environmental impact statement, a statement of need, and information relating to different zoning ordinances. So, be sure to provide all these alongside drawings when submitting your application for a building permit.
Final Thoughts
Building permits are essential to ensure that the building itself is up to safety and environmental standards and the processes used in the actual construction are compliant with these standards. While this guide lays out the major steps, you should take into consideration additional requirements your jurisdiction may have on building plans.
While drawing plans can in some circumstances be done outside of a hired professional, it may be best to bring in these individuals. Despite the increase in cost, this will save you the trouble of making sure you meet all standards and ensure that the plans are done correctly.
Sources
- Crest Real Estate: How To Draw Building Plans For A Building Permit
- Hunker: How to Draw Plans for Building Permits
- Permit Advisors: How To Draw Your Own Plans
- 24hPlans.com: How to Draw a Site Plan for Your Property – DIY Plot Plan Options
Share this Post
Giovanni Valle is a licensed architect and LEED-accredited professional and is certified by the National Council of Architectural Registration Boards (NCARB). He is the author and managing editor of various digital publications, including BuilderSpace, Your Own Architect, and Interiors Place.