Affiliate Disclaimer: Some of the links below are affiliate links. As an Amazon Associate, I earn from qualifying purchases.
Proper finishing of exposed tile edges gives your tiles a professional look while shielding the edges from moisture and cracks. Among the many finishing options, caulking is the most cost-effective and easiest way to get that waterproof seal. It works best for tumbled stone, mosaics, porcelain, and glass tiles.
To finish tile edges with caulk, adhere to the following simple steps:
- Install and grout all the tiles and edge pieces.
- Select a caulk that closely matches the grout.
- Apply a fine layer of caulk along the exposed edges.
- Smoothen the caulk line.
- Touch up uneven areas of the caulk line with wall paint.
- Give the caulk time to cure and dry.
Keep on reading for a detailed guide, elaborating the steps above, as well as other advanced techniques to give your tiles the installation and finish it deserves.
1. Install and Grout All the Tiles and Edge Pieces
Here are a few steps to a perfect tile installation:
- Choose the tile type and prepare the floor. Use a floor scraper to remove any unwanted material. If your tile floor has any low spots, use a leveling compound to fill them.
- Gather all the materials and tools. These include tile spacers, tile cutter, rubber mallet, tile trowel, the level, and thin-set mortar.
- Draw a layout of your tile design. Layout lines help you to center the tiles properly.
- Test your desired layout by dry-running your tiles. This is essential to ensure you have the design you want.
- Prepare your thin-set mortar. This is the bonding agent for attaching tiles to concrete subfloors or backer boards.
- Use a tile trowel to scoop the mortar from the mixing bucket. Be generous with the mortar, since you can always scrape away any overspill at the end.
- Test your mortar and set up the first tile. If you’re happy with it, continue the process.
- Apply the mortar in subsections where you want to fix the tiles. Do not apply it to the entire room at once to avoid mistakes.
- Level up the tiles. Finish laying the tiles side by side until you are happy with the layout.
- Measure the tiles and cut them to fix the spaces along the walls. Ensure you cut them accurately so as to keep the final finish pristine.
To grout the tile, here are the steps:
- Choose a matching grout color.
- Apply the grout.
- Allow the grout to set.
- Use a damp sponge or cloth to wipe the unwanted grout and haze from tiles.
2. Select a Caulk That Closely Matches the Grout
Caulks come in various types to suit your home improvement needs. The caulk type you use depends on the tiling material and floor surface. The most widely used types of caulk include:
- Latex caulk – This is a standard general-purpose caulk. The White Lighting Latex Caulk is inexpensive and dries very fast. It’s best suited for wet areas like laundry rooms and bathroom floors. Besides sealing the joints, the caulk also provides anti-moisture protection. You can use the latex caulk on any tile product or baseboard.
- Silicone caulk – This is used in baseboard installations in areas with high traffic or bacterial concerns. You’ll find silicone caulk such as the Gorilla Sealant in public places like airports, malls, and commercial kitchens. It also works well for bathroom tiling fixtures.
- Acrylic caulk – If you’re using tile baseboards, acrylic caulk is what you’ll need. It’s a perfect choice for ceramic tile insulations. You can get an acrylic caulk such as the Sashco Caulking Sealant for wet areas and dry places.
- Polyurethane caulk – This durable multi-purpose caulk is ideal for robust interior installations. Even though it’s considered superior to acrylic caulk, polyurethane such as the Loctite White Sealant is challenging to install, making acrylics more popular.
- Latex caulk with silicone – The DAP Caulk offers added moisture resistance compared to the standard latex caulk. It’s also more flexible and durable, all thanks to the silicone. Even though most people refer to it as tub and tile caulk, it’s not as perfect as pure silicone for bathroom fixtures and tiles.
Note: You can find all these caulks in various colors. Choose the color that matches your tile and grout color as closely as possible.
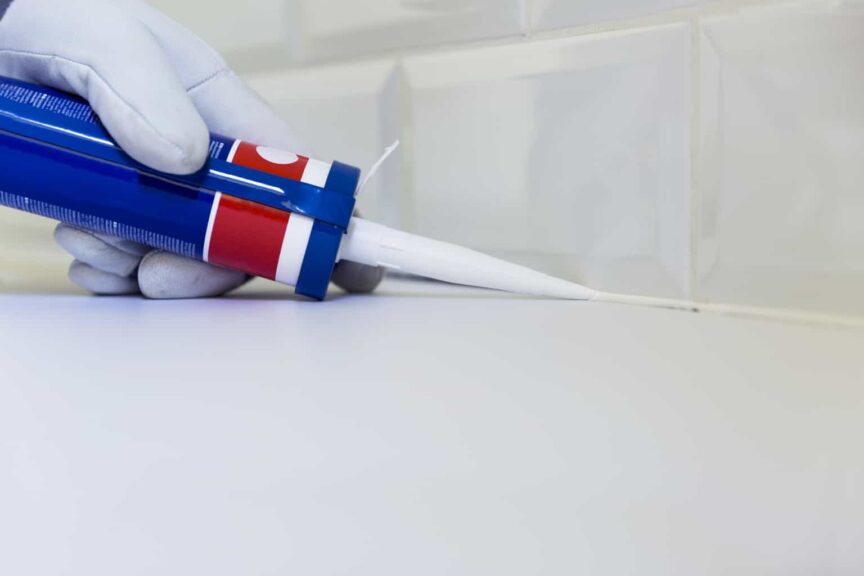
3. Apply a Fine Layer of Caulk Along the Exposed Edges
To make the application easy, buy a caulk with a built-in applicator, or you can purchase an application bottle or caulk gun. Ensure you read and understand the manufacturer’s instructions before caulking the edges.
To make application easier, take a blue painter’s tape and mask off the surface at the point where you want to seal. Ensure you straighten the painter tape and use long tape sections and not short pieces. The aim is to cover the edges to minimize the chances of caulk seeping underneath.
To open the seal, Cut the nozzle tip of the caulk at a 45-degree angle using a knife. Insert a clean, long wire or nail to puncture the inner seal. Some caulk guns come with a built-in snipper for piercing the caulk tube tip and a puncture wire for breaking the seal.
Maintain a 45-degree angle when applying the caulk between perpendicular and horizontal. Put the caulk tube tip along the edge and slowly squeeze the caulk gun’s handle to force the caulk into the joint or gap. Ensure you work at a consistent speed. Remember, a smoother initial application creates outstanding results.
In wet areas like bathtub fronts, fill the edge gaps with caulk and use a damp finger to smooth out the caulk. This will help create a water-tight seal.
4. Smoothen the Caulk Line
You can use either water or rubbing alcohol to wet your finger. Water works perfectly for latex caulk while rubbing alcohol is best for silicone. The water or alcohol serves as a thinning agent and a lubricant as you smoothen the caulk line.
Exerting light pressure, smooth the caulk joint from one end to the other. If your finger becomes loaded with excess caulk, use a dampened rag to wipe it off, and rewet the finger again.
Continue with the smoothing process until you cover the entire caulk line. Examine the joint; if you see any gap, add a small caulk and smooth it with the finger.
Alternatively, you can use a popsicle stick instead of your finger or put on tight-fitting latex gloves.
5. Touch Up Uneven Areas of the Caulk Line With Wall Paint
Before applying paint to your caulk, give it some time to cure. Some latex caulks dry quickly and can be ready for paint within 30 minutes. However, silicone caulk may take several days to dry and cure before subjecting it to paint.
Once everything has dried, paint in even subsections to ensure you have covered each part. Paint is difficult to redo, so try to maintain a slow speed to lessen the chance of making mistakes.
6. Give the Caulk Time To Cure and Dry
It’s best to wait for the caulk line to dry before exposing it to moisture and water. Generally, it takes between 1 to 10 days for the caulk line to dry and cure completely.
If you don’t give the caulk time to cure and dry, it may be subject to water damage. This might mean you have to start the caulking process over again.
Final Thoughts
When it comes to tiling and fixing tile edges, there’s no room for shortcuts. Follow the steps above to give your tiles a waterproof seal using caulk. For long-lasting results, use the ideal caulk type for your tiles.
Sources
- GetRit: How to Finish Tile Edges with Caulk
- Homedepot: 3 Easy Tile Edging Options Clients Love
- Homedepot: How to Grout Tile
- Homedepot: How to Install a Tile Floor
- Homesteady: The Best Caulk to Use Between Ceramic Tile and Baseboard
- The Spruce: How to Caulk Like a Pro
- The Spruce: How to Choose the Right Caulk for Your Next Project
Share this Post
Giovanni Valle is a licensed architect and LEED-accredited professional and is certified by the National Council of Architectural Registration Boards (NCARB). He is the author and managing editor of various digital publications, including BuilderSpace, Your Own Architect, and Interiors Place.