The specific way to fix wrinkled drywall tape depends on the condition & extent of the problem. Any wrinkles or crinkles and other issues, like blisters, are relatively easier to fix and prevent during installation. However, how do you fix wrinkled drywall tape after it is glued and coated?
Here are three ways to fix wrinkled drywall tape:
- Remove isolated wrinkles on drywall tape and patch the area.
- Pull out long strips of wrinkled drywall tape and retape.
- Prevent drywall tape from wrinkling during installation.
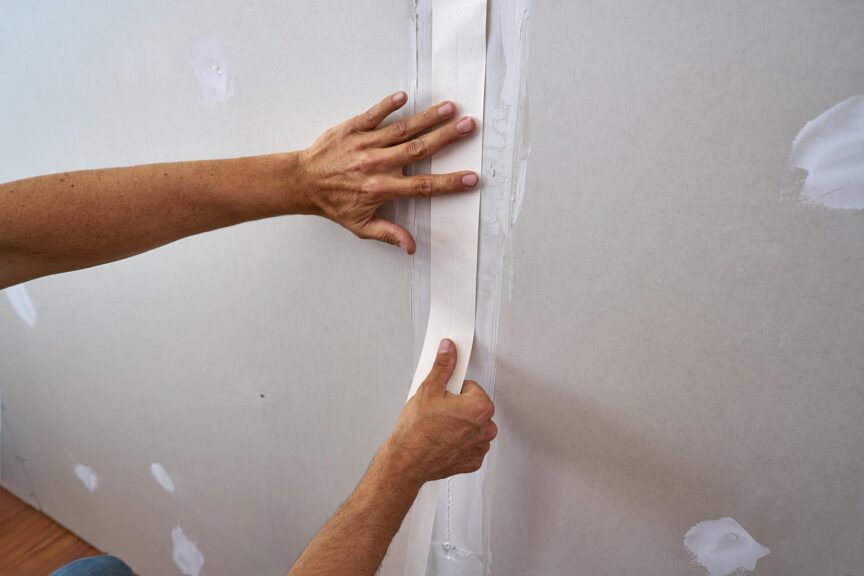
Properly installed drywall tape should not wrinkle during or after application, be it paper, mesh, fiberglass, metal-reinforced, or vinyl composite. However, you must use the right materials and techniques. Read on to know how to fix wrinkled drywall tape in different stages and conditions.
1. Remove Isolated Wrinkles on Drywall Tape and Patch the Area
You may find isolated wrinkles during or after installation. The two scenarios are distinct, and thus the remedies are different. Also, a wrinkle or two may pop up in the midst of subsequent coatings, especially after the first coat on the tape is already dry.
How To Fix Isolated Wrinkles on Drywall Tape During Installation
There are two solutions to fix isolated wrinkles during installation. The first one is applicable to wrinkles while swiping the mud coating over the tape, and the second solution is for situations after the base, and the first coat of the joint compound is dry, and the drywall tape has adhered.
During the First Round of Coating
You may use your drywall knife or trowel to smooth out the wrinkles while coating and uniformly spreading the mud or joint compound. However, this remedy only works when the drywall tape is yet to adhere completely, and the joint compound or mud is still moist.
Do not swipe your trowel or drywall knife from the ends of the applied tape, be it the top, bottom, or either side. Always swipe from somewhere around the midpoint of the installed tape.
Thus, begin swiping from closer to the middle of the applied tape in this case instead of running down, up, or sideways covering the full strip on the drywall joint. Do not start your drywall knife or trowel from any overlap.
Also, never swipe in perpendicular motions or against the length of a drywall tape. Always swipe your trowel on and along the length of a tape for the first coat.
After the First Round of Coating
Wrinkles after the first coat over partially adhered drywall tape require a redo. You can pull out the parts where the drywall tape has wrinkles and retape these areas with sufficient overlap.
Ensure flawless mudding, coating, and adhesion of the drywall tape, especially at the newly created seams. Also, apply the drywall tape pieces in the exact alignment as you did initially. If you put the crease on paper tape down, facing the drywall, do the same when you’re tape.
How To Fix Isolated Wrinkles on Drywall Tape After Installation
You don’t need to take apart fully adhered drywall tape with isolated wrinkles. Get a utility knife, cut out the wrinkled parts, ensure there are no blisters or other aberrations, and patch these areas with drywall mud or joint compound.
Exercise caution when cutting the wrinkled parts of the dried mud and tape so that you do not damage the drywall. Also, regular drywall muds or joint compounds shrink to varying extents. Thus, account for such shrinkage when you apply the material to patch the affected areas.
You don’t have to aim for a perfectly even finish on these parts because sanding the patches later will prepare the surface for the drywall primer before you paint. Hence, tiny grains here and there are fine. However, you cannot have a depressed part with shrunk or recessed mud.
2. Pull Out Long Strips of Wrinkled Drywall Tape and Retape
Isolated or sporadic wrinkles limited to a few places along the drywall joints are not as daunting as long, uneven, and bumpy strips with sizable crinkles. If large portions of adhered drywall tapes have wrinkles, you have no other option but to cut those out and retape these parts.
Take a utility knife to cut along the wrinkled drywall tape. Cover the entire length that needs retaping. Also, you may have to cut out a slightly larger section than the evident wrinkled parts because you have to sand these areas before installing new tape. Leftover adhered tape and traces of dried mud or joint compound can create problems if you don’t sand these portions.
Retaping is essentially installing new drywall tape. Hence, you have to sand the surface, put on the base coat of the drywall mud, place new tape on the seam, and apply the joint compound over it. Trowel this first coat to ensure the mud is evenly spread out under and over the tape.
Check if the new tape is properly applied and there is no possibility of wrinkles, blisters or bubbles, and other issues. Allow the tape to adhere and the mud to completely dry before you go for the skim coats. Also, abide by the best practices throughout the installation process.
3. Prevent Drywall Tape From Wrinkling During Installation
Drywall tapes wrinkle due to many reasons. Avoiding each causal issue while preparing and installing can save you some heartache, effort, and time. Here are a few tips to prevent drywall tape from wrinkling:
- Ensure the two drywall panels are leveled at their joints or seams.
- Dilute the drywall joint compound with water if it is a regular variant.
- Mix the water thoroughly to ensure the mud has optimum consistency.
- Apply a generous coat of the compound on and along a drywall joint.
- Trowel the mud to prepare an even base for the drywall tape to adhere to.
- Avoid thinning out the base coating of the mud or joint compound.
- You will get excess mud out from under the applied tape while troweling.
- Apply the drywall tape linearly when the mud is still sufficiently moist.
- Swipe your drywall knife from somewhere near the middle of the tape.
- Use swiping motions on and along the length of the drywall tape.
- Avoid excess pressure to retain sufficient mud under the drywall tape.
- Ensure there are no bubbles or loose edges of the tape during the first coat.
Do not use a joint compound or mud if it is too runny or dry and pasty, as neither will facilitate the necessary adhesion of the tape. Also, you have to get rid of air pockets from under the tape after placing it on the base coat. However, don’t squeeze out all the mud, which glues the tape.
Conclusion
Fixing wrinkles on drywall tape is tedious and may sometimes require a redo. In addition, preventing wrinkles is easier than fixing them. If there are too many wrinkles that are beyond fixing, and you need to do things over, you may want to follow these tips:
- Start with one small and manageable section.
- Apply the base coat.
- Use a drywall knife for an even spread.
- Place the tape.
- Apply the first coat.
- Use the trowel gently at an acute angle.
- Let the tape adhere and mud dry, and work on another part of the drywall in the meantime.
Sources
- HomelyVille: Types of Drywall Tape
- AskingLot: What Causes Drywall Tape to Wrinkle?
- DIY Chatroom: Crinkles on Full Wall Drywall Seams
- SFGATE: How To Fix a Wrinkle in Drywall
- Buyers Ask: Drywall Tape – Loose, Bubbles or Wrinkled
- YouTube: Drywall Mudding 101
- YouTube: Why Your Paper Tape Blistered!!
- YouTube: You’re Taping Drywall Wrong, and This Is Why It Fails
- YouTube: Fixing a Bad Tape Job – (Part 1) Drywall Repair & Wall Preparation
- YouTube: Fixing a Bad Tape Job – (Part 2) Drywall Repair & Wall Preparation
- YouTube: Which Drywall Tape is Better: Paper or Mesh?
- YouTube: I Was Taping Drywall with Paper Tape Wrong for 35 Years?
Giovanni Valle is a licensed architect and LEED-accredited professional and is certified by the National Council of Architectural Registration Boards (NCARB). He is the author and managing editor of various digital publications, including BuilderSpace, Your Own Architect, and Interiors Place.