There are a few kinds of joints that are incorporated in concrete slabs. Two of the most common are control joints and construction joints. They sound similar, but are they the same?
What is the difference between control joints and construction joints? Control joints are cut into the slab as it dries to regulate cracking. Concrete shrinks a little bit as it dries. Since concrete isn’t flexible, this shrinkage can cause it to crack. The bigger the slab, the higher the risk. Control joints focus the cracking so that it’s not ugly or dangerous.
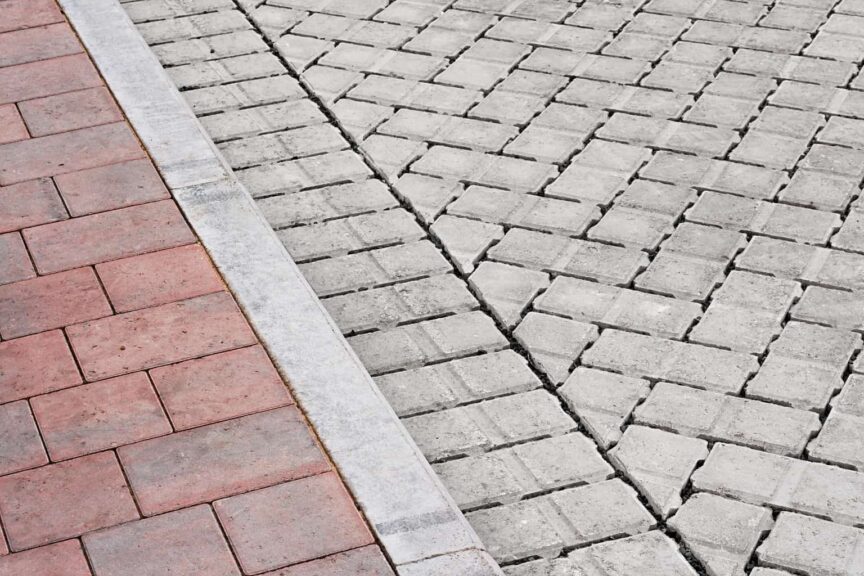
Construction joints are interruptions in the slab between different pours of concrete. Since you can’t pour concrete non-stop, there is a break between sections of the pour. Each time you stop the pour, you get a construction joint. With some planning, construction joints can also be control joints. You might recognize control joints as the grooves that are cut at intervals into pretty much every piece of concrete you’ve ever seen.
How Control Joints Work
With concrete, it’s not a matter of if it will crack, it’s a matter of when and where. That’s where control joints come in. You know that a big slab of concrete will shrink as it dries. You know that the shrinkage will cause cracking. Instead of letting the concrete crack all over the place, you cut in construction joints. These joints make the concrete crack where you want it to.
You should have a plan for control joints before you pour the concrete. Every concrete slab needs control joints. Calculate the spacing and sketch out where you want them as part of your design process. That way, you will cut them correctly when the time comes.
The grooves should be cut to ¼ of the depth of the slab. That is, a four-inch sidewalk needs control joints one inch thick. A twelve-inch slab needs control joints cut to three inches. A concrete saw is required to make these cuts.
Control joints are made by cutting grooves in the slab as soon as it’s hard enough to cut without raveling. When it’s ready, the saw will make a smooth cut that doesn’t smear or crumble along the edge. The timing of the cut depends on the weather and the concrete mix you are using. It can be as soon as four hours after the pour in hot weather, or as long as three days in extreme cold.
Cutting grooves makes the concrete weaker along the line of the cut. As the concrete dries and shrinks, the stress of shrinking breaks through the weak spots first. Since you planned the joints and laid them out in a pattern, that’s where the concrete cracks.
Instead of looking like a spiderweb, the breaks look like the regular grooves.
Planning Control Joints
There is a range of spacing that works for control joints. To calculate the minimum and maximum spacing, use this handy rule of thumb:
Minimum joint spacing in feet = slab thickness in inches X 2
Maximum joint spacing in feet = slab thickness in inches X 3
Say you have a slab six inches thick. Your control joints should be at least twelve feet apart (6×2=12). They shouldn’t be more than eighteen feet apart (6×3=18)
You should also insert control joints where the concrete has a significant shape change. Inside corners, variations in thickness, or changes in load are all prime cracking spots. Plan control joints in these places and space the rest of the joints out from there. You can also plan control joints for areas that will be hidden, so they aren’t so obvious. Good spots for hidden joints include where walls are intended or areas that will be carpeted.
What if You Skip the Control Joint?
If you don’t put in control joints, your concrete will still shrink and crack. Instead of straight lines at regular spacing, you’ll have crazy cracking all over the place. Your brand-new slab will look awful from the very beginning.
Construction Joints
You get construction joints when you stop pouring for the day. They can be planned or unplanned. Either way, construction joints can serve as control joints. Since two different slabs are touching, the construction joint automatically acts as a crack.
If you are pouring a sidewalk, patio, or something else for foot traffic, you don’t need a sturdy joint. A butt joint works fine. That means you have two slabs that butt up against each other with two vertical edges. Butt joints don’t let the two slabs reinforce each other. That’s not a problem if the weight involved is light. To make a butt joint, you need a bulkhead – a thin strip of material that stays in the joint. It holds in the wet concrete, then remains to serve as a control joint.
If the joint needs to stand up to vehicles (even forklifts in a warehouse setting), it needs some planning. There are a few options for creating a reinforced construction joint.
- Keyed joint The form used along the joint has a profile that makes a groove on one edge and a tongue on the other. The intrusion of the tongue into the groove locks the slabs together. This has been the standard construction joint for years. They even make forms designed to serve as a keyed joint.
- Butt joint with dowel Steel bars are inserted halfway into the first slab before it dries. The second slab is poured over the bars, and they are covered. The joint is locked together by the dowels. Smooth dowels allow the concrete to contract and expand without limits along the joint.
This is an excellent way to go if you are joining a new slab to an existing one. You’ll have to drill holes in the existing slab for the dowels, but that isn’t super difficult. - Butt joint with tie rod Instead of a smooth bar, rough or bent bars are used. The joint is locked against expansion as well as vertical loads. These are limited to two new slabs.
What if You Skip the Construction Joints?
You can’t skip these unless you make a continuous pour. Such a pour would mean that once you start, you keep the concrete coming around the clock until the entire slab is done. Continuous pours take a high level of engineering and planning. They are reserved for dams, skyscraper foundations, and other specialized applications.
If you skip the reinforced construction joint, you risk one slab shifting more than the other. You could end up with a ridge where one slab is taller than the other. It’s ugly and can be a trip hazard. This isn’t a massive problem with sidewalks, but it can be in driveways that handle more weight.
Expansion Joints
Some concrete also has expansion joints. These are used when different parts of the structure might expand and contract at different rates. They are often found on bridges or buildings with vertical and horizontal slabs. Expansion joints allow the slabs to expand and contract with temperature changes without cracking or pushing the other slab out of place.
Expansion joints are common in highly-engineered structures but not necessary for flat slabs that homeowners might pour. If you are putting in a sidewalk, patio, or driveway, you don’t need to worry about expansion joints.
Closing Notes
We tend to think of concrete as stable and unchanging, but that’s not true. Concrete moves and shifts. This shifting causes cracks. Either you plan for the cracks and control them, or the cracks will come, usually not where you want them.
Share this Post
Giovanni Valle is a licensed architect and LEED-accredited professional and is certified by the National Council of Architectural Registration Boards (NCARB). He is the author and managing editor of various digital publications, including BuilderSpace, Your Own Architect, and Interiors Place.